FDIC-Insured - Backed by the full faith and credit of the U.S. Government
Access eStatements | View Current and Last Statement Balances | View and Download Transaction Information | View Check Images | View and Download Check Information | Create On Demand Activity Reports in Modern Platform (Business Client Access Only) | Create On Demand Activity Reports in Cash Management (Business Client Access Only)
Access eStatements
Standard availability for eStatements is the second business day following a statement cycle.
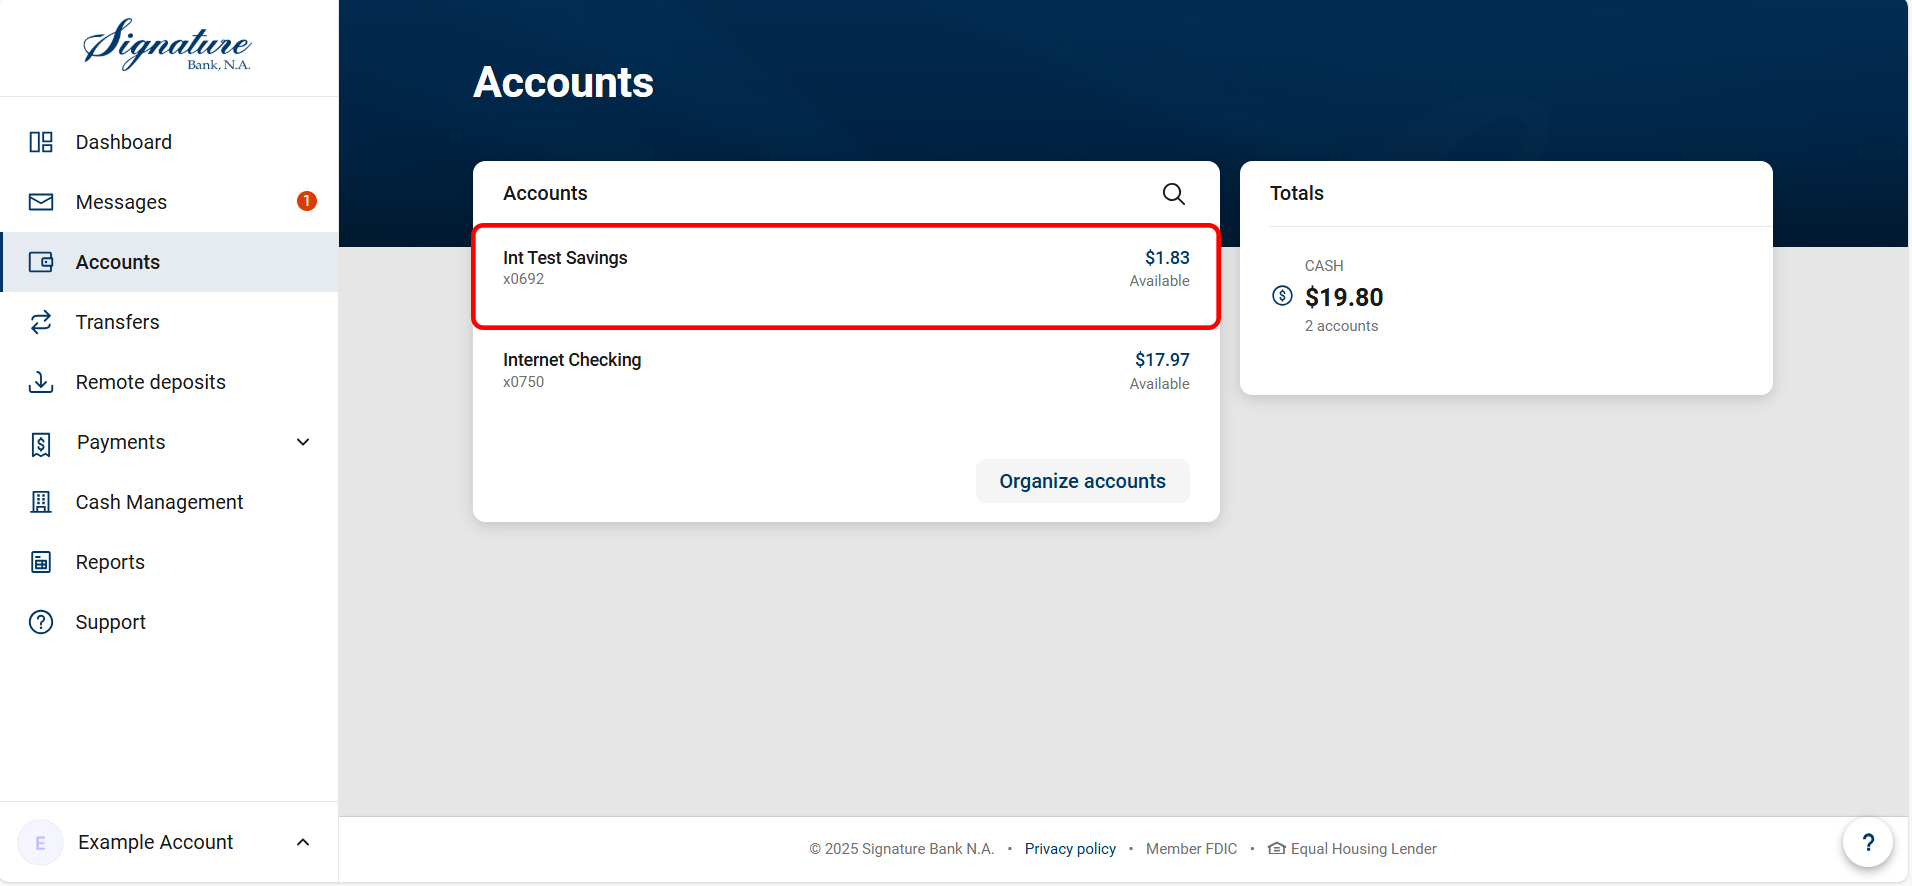
- Select any account from the dashboard on the home page, or from the accounts list at left.
- Choose the eStatements Quicklink near the top right of the Account Detail screen.
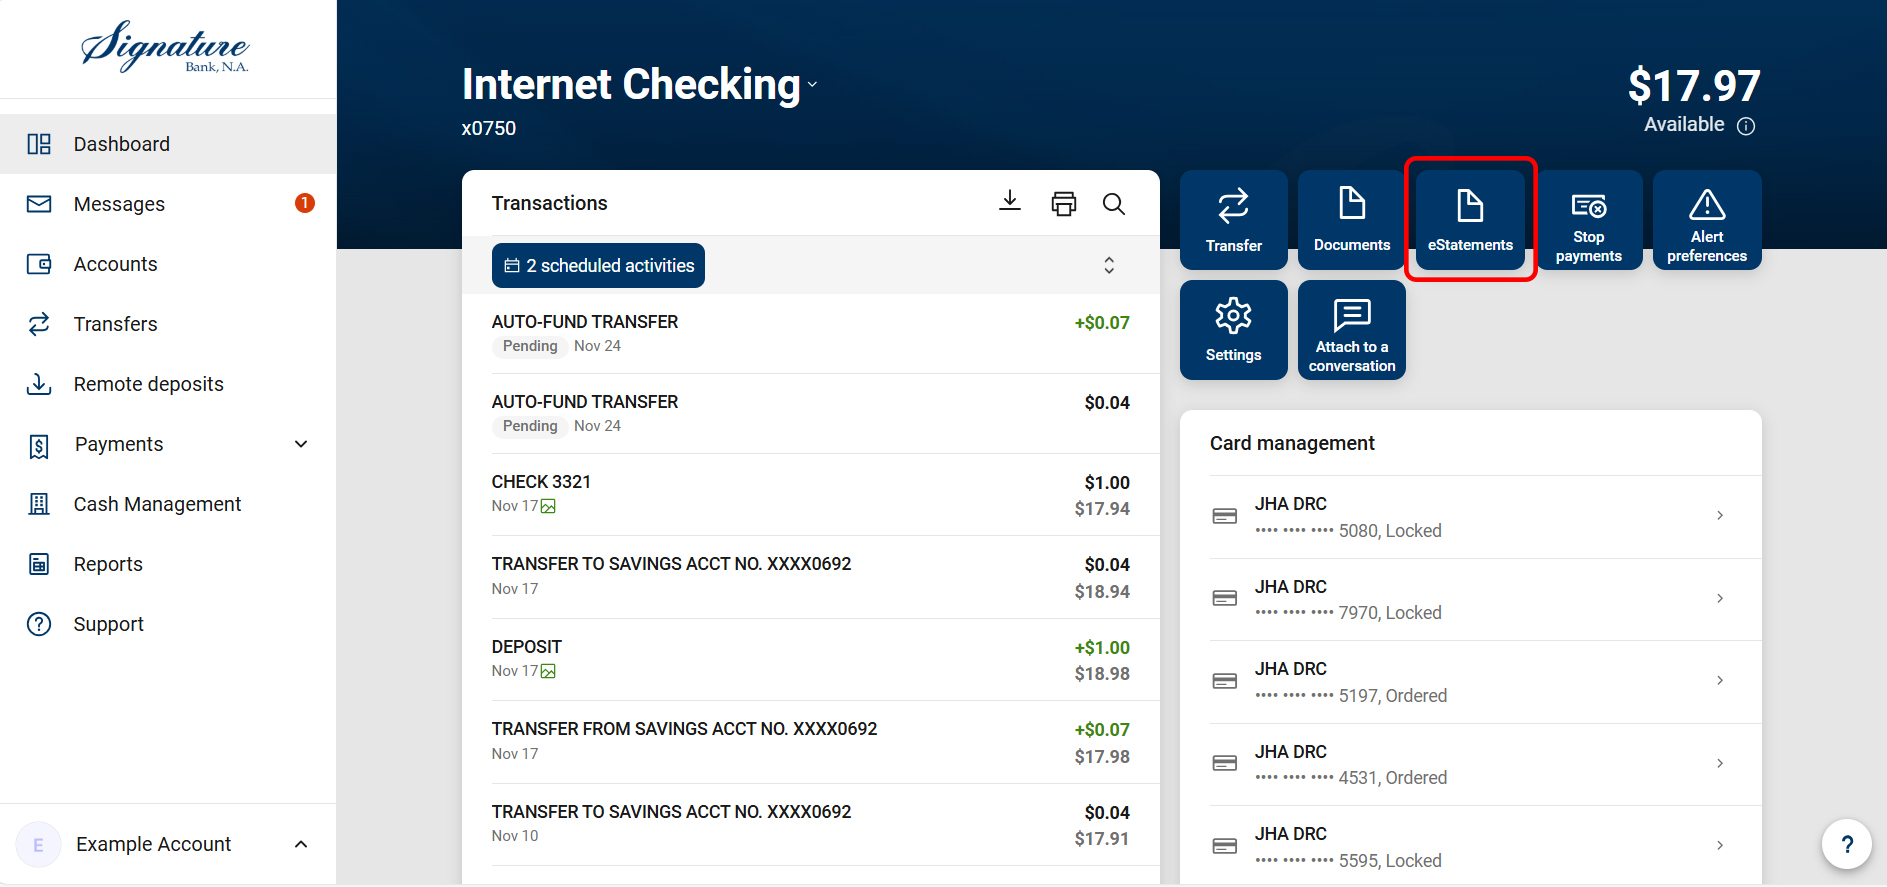
- To view statements choose “eStatements/Notices” tab.
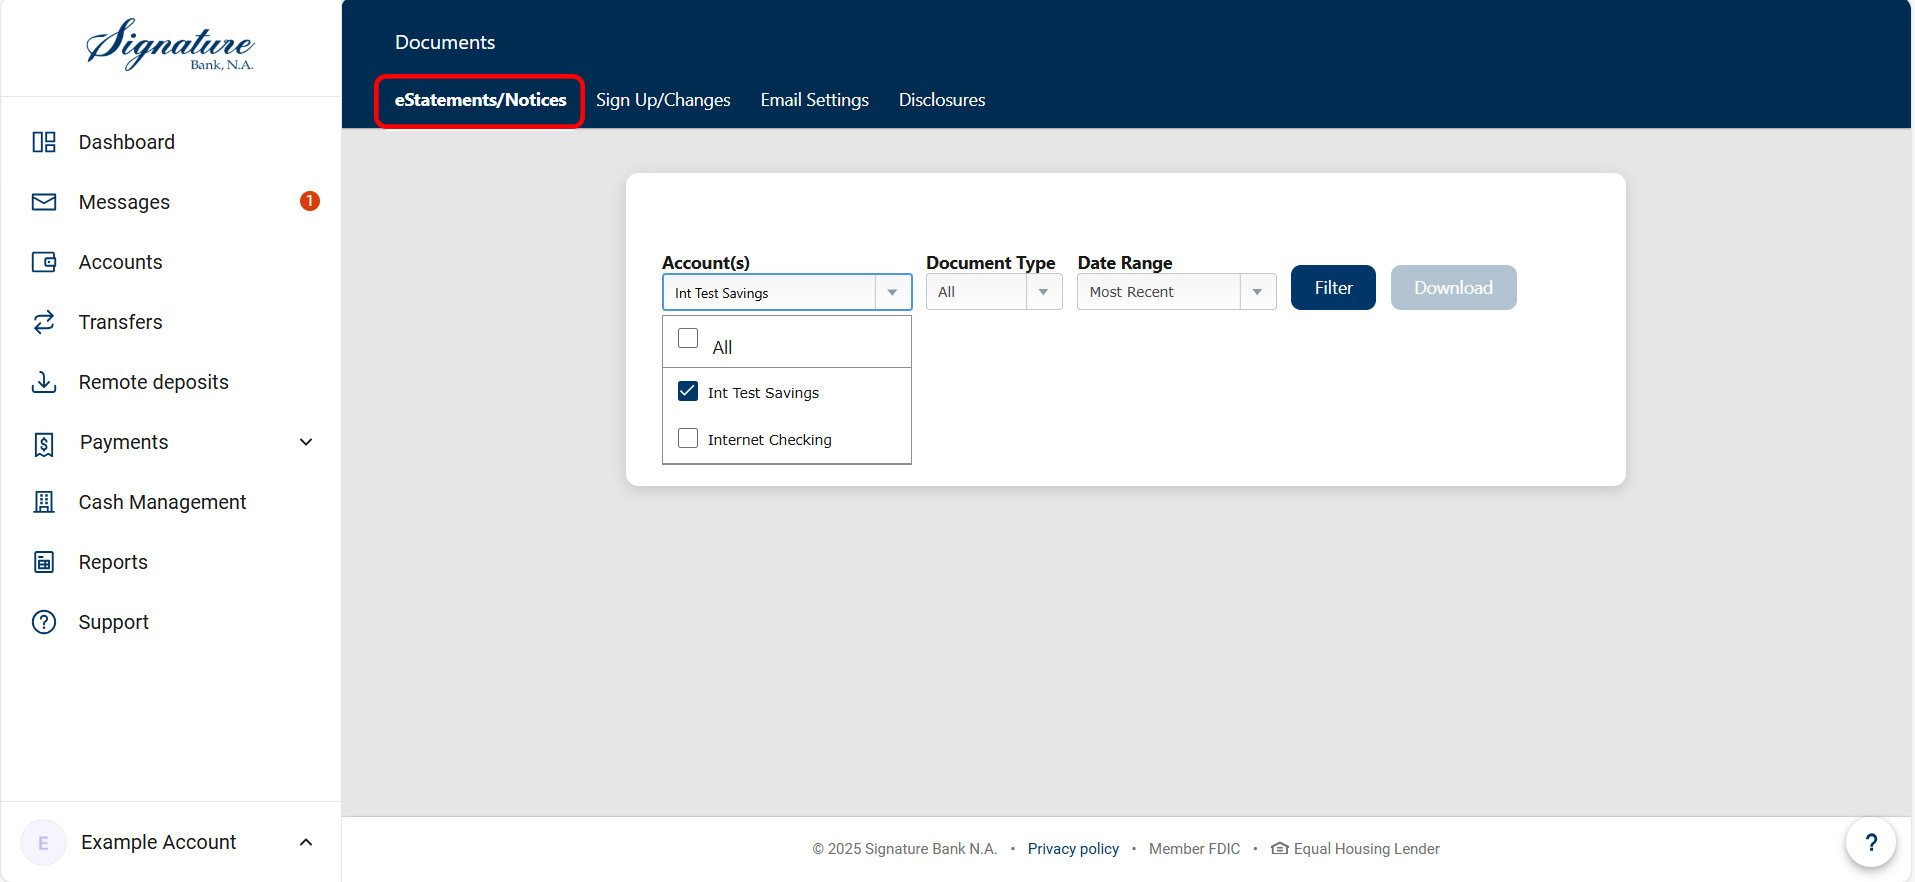
- To change enrollments, an administrator must select “Sign-Up/Changes” and follow the on-screen prompts to select the individual accounts and document types they would like enrolled.

View Current and Last Statement Balances
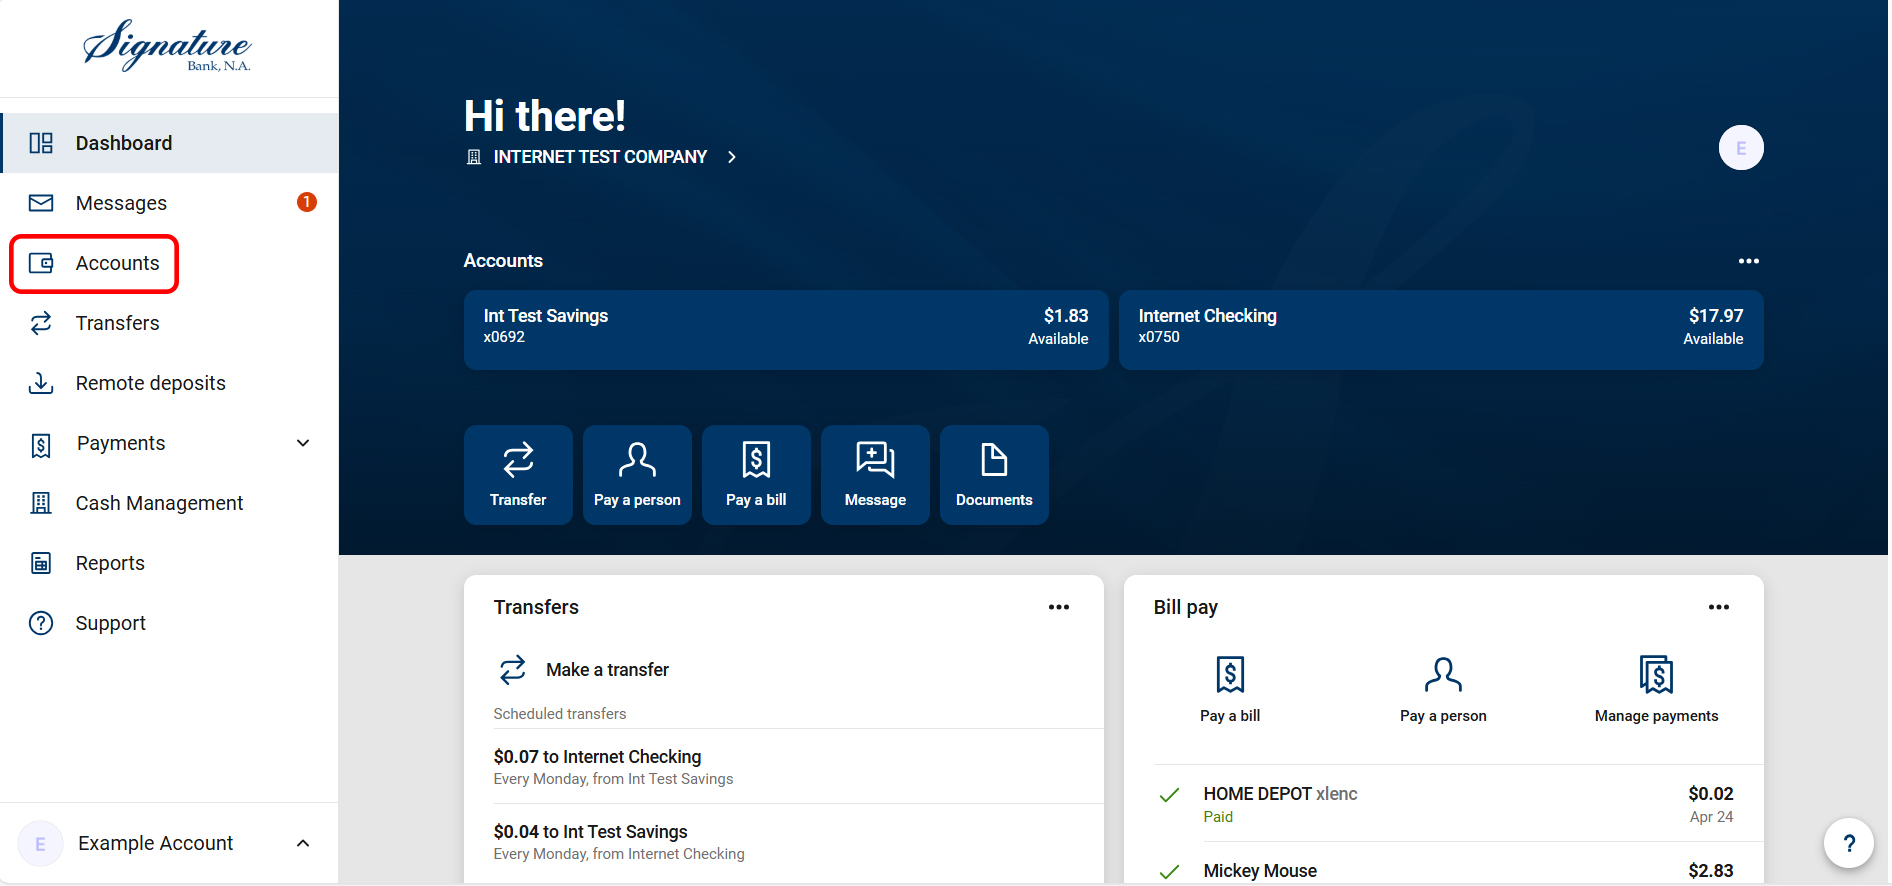
- Select “Accounts.”
- Select an account.
- Choose the “i” icon next to the listed balance in the top right of the account inquiry screen.

- The Current Balance is the balance at the close of business the previous business day.
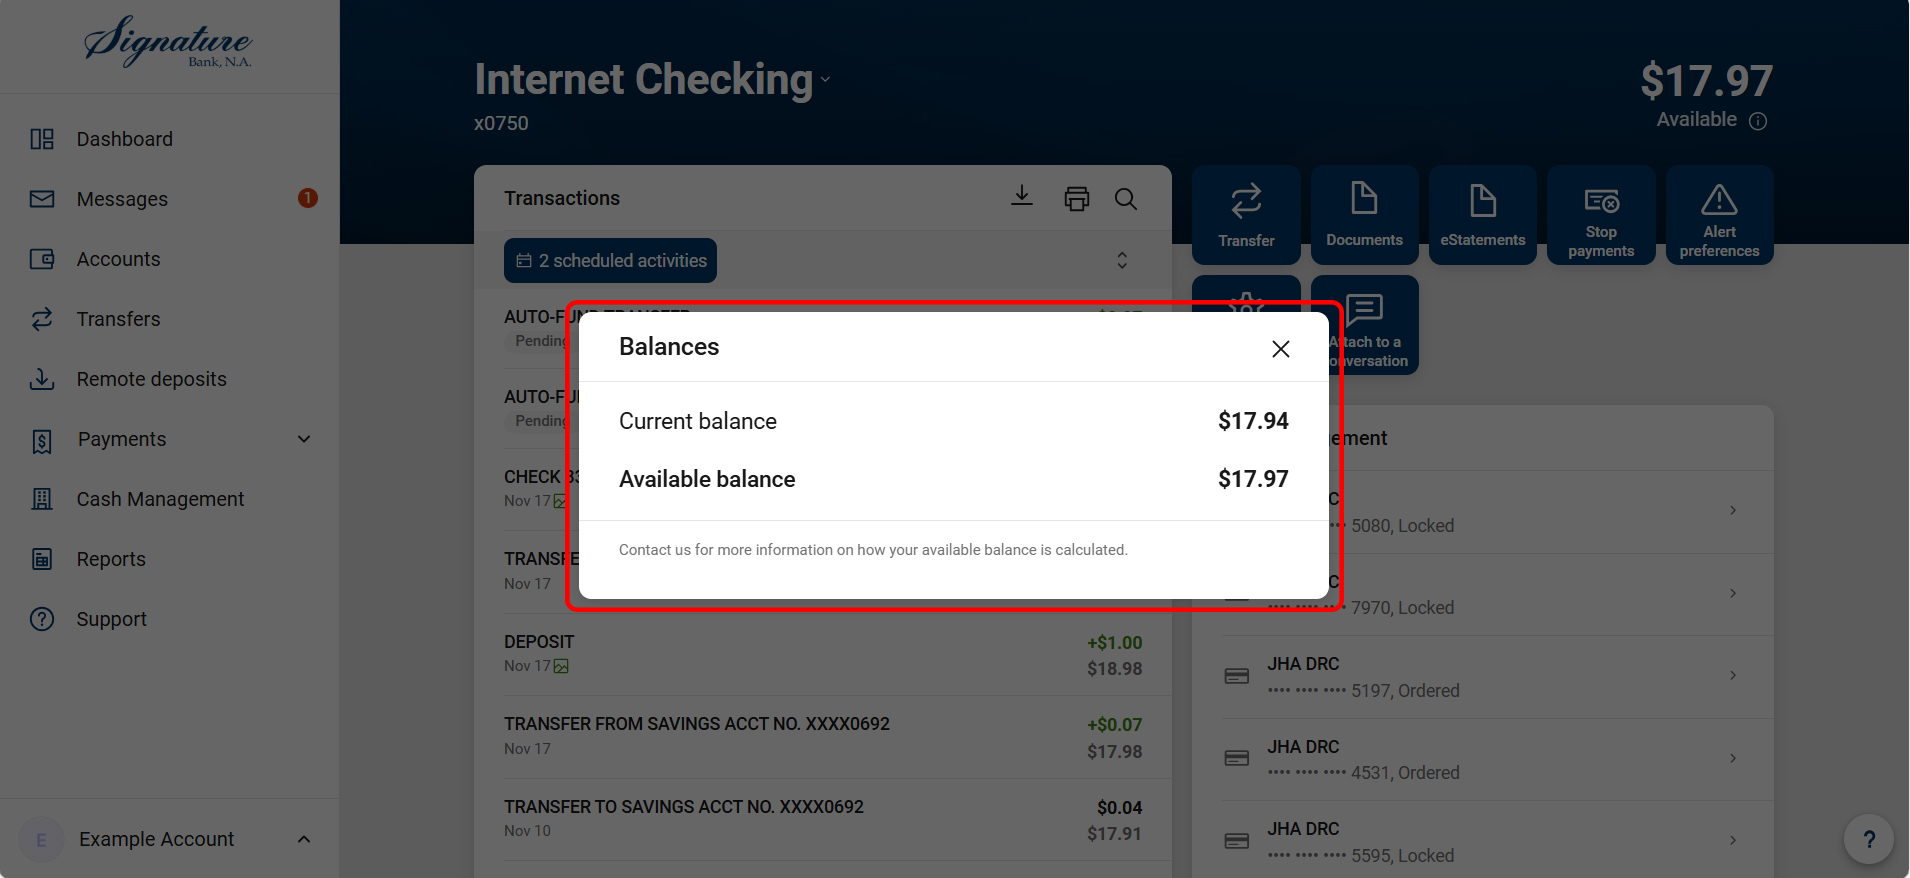
- Scroll down the page and look on the right-hand side of transactions pane to see the Last Statement Balance, shown below.

View and Download Transaction Information
How can I view and download transaction information before eStatements are available?
If you do not wish to enroll in eStatements, or want to begin reviewing your statement information before eStatements are released, you can still quickly print or download account history by performing the following steps:
- Select “Accounts.”
- Find the account you would like to see statement activity.
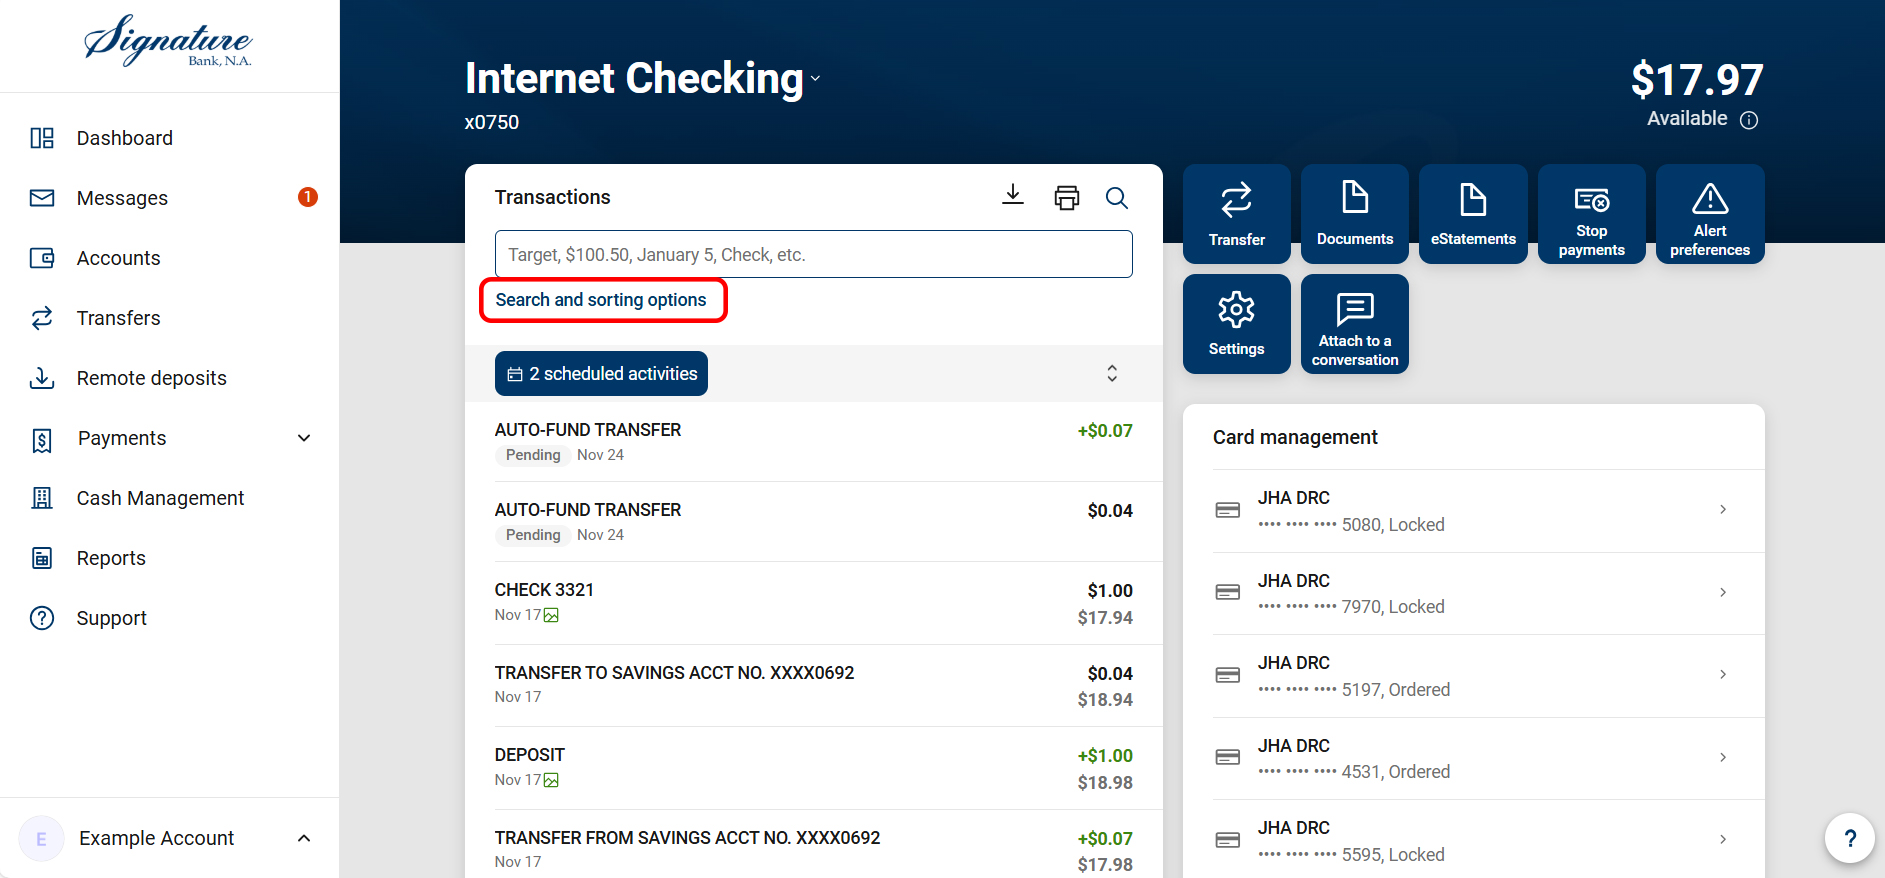
- Click on the magnifying glass.

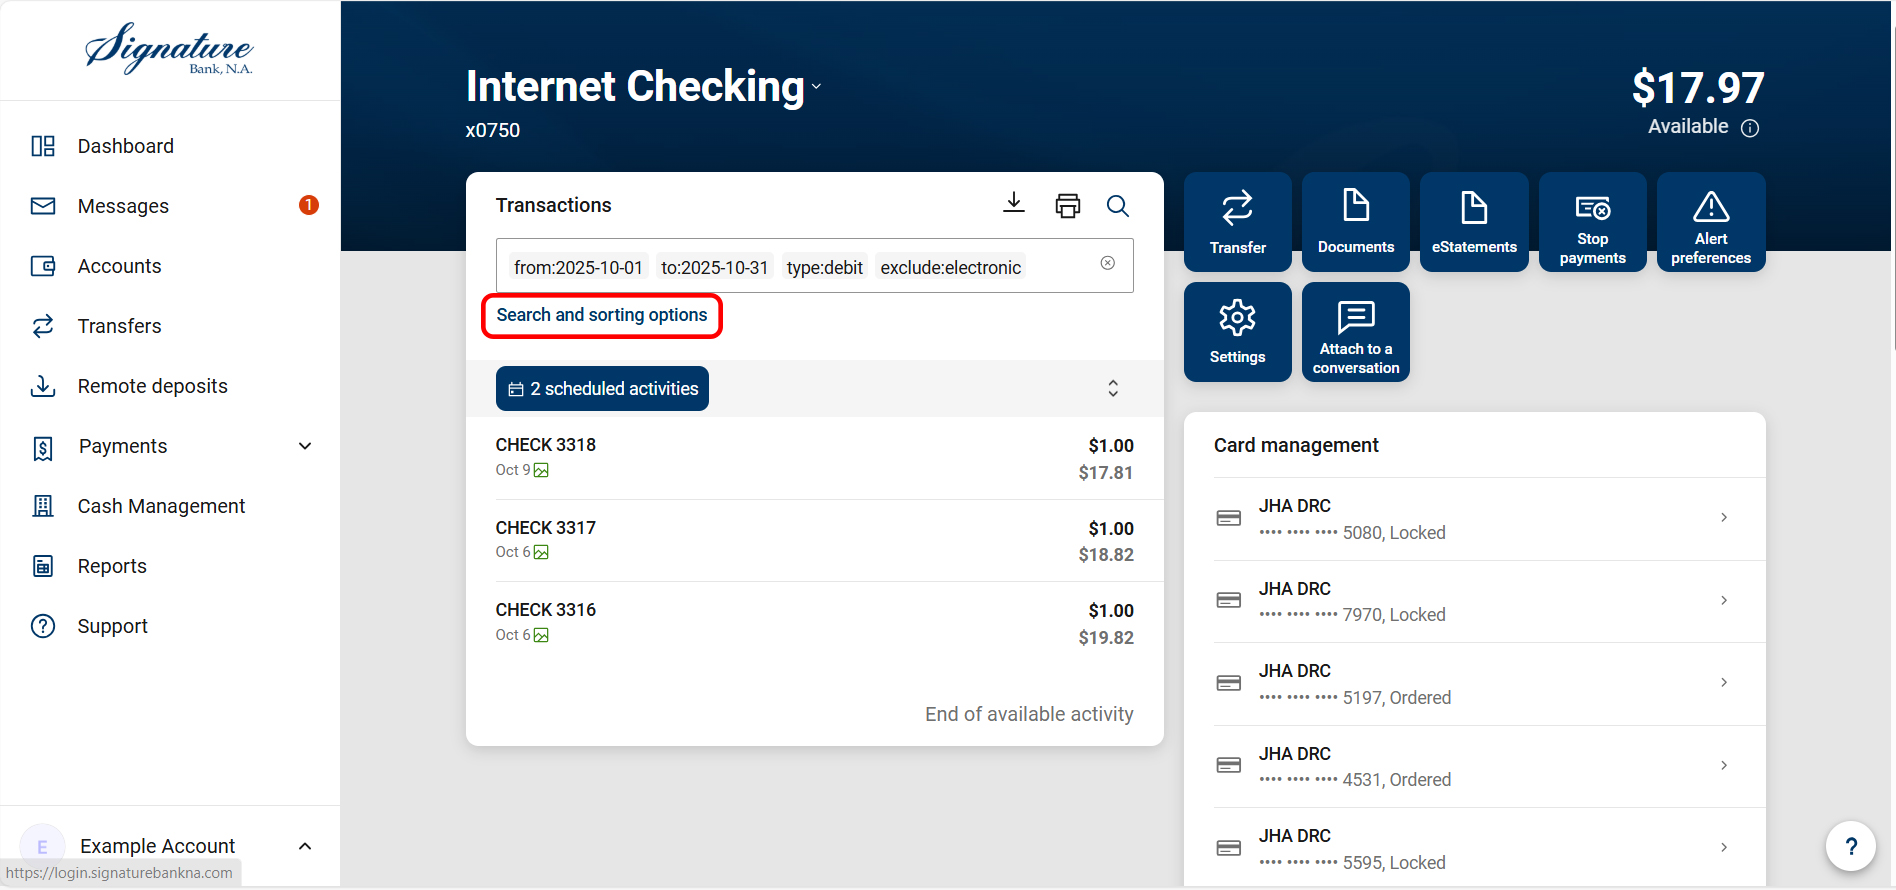
- Select “Search and sorting options.”
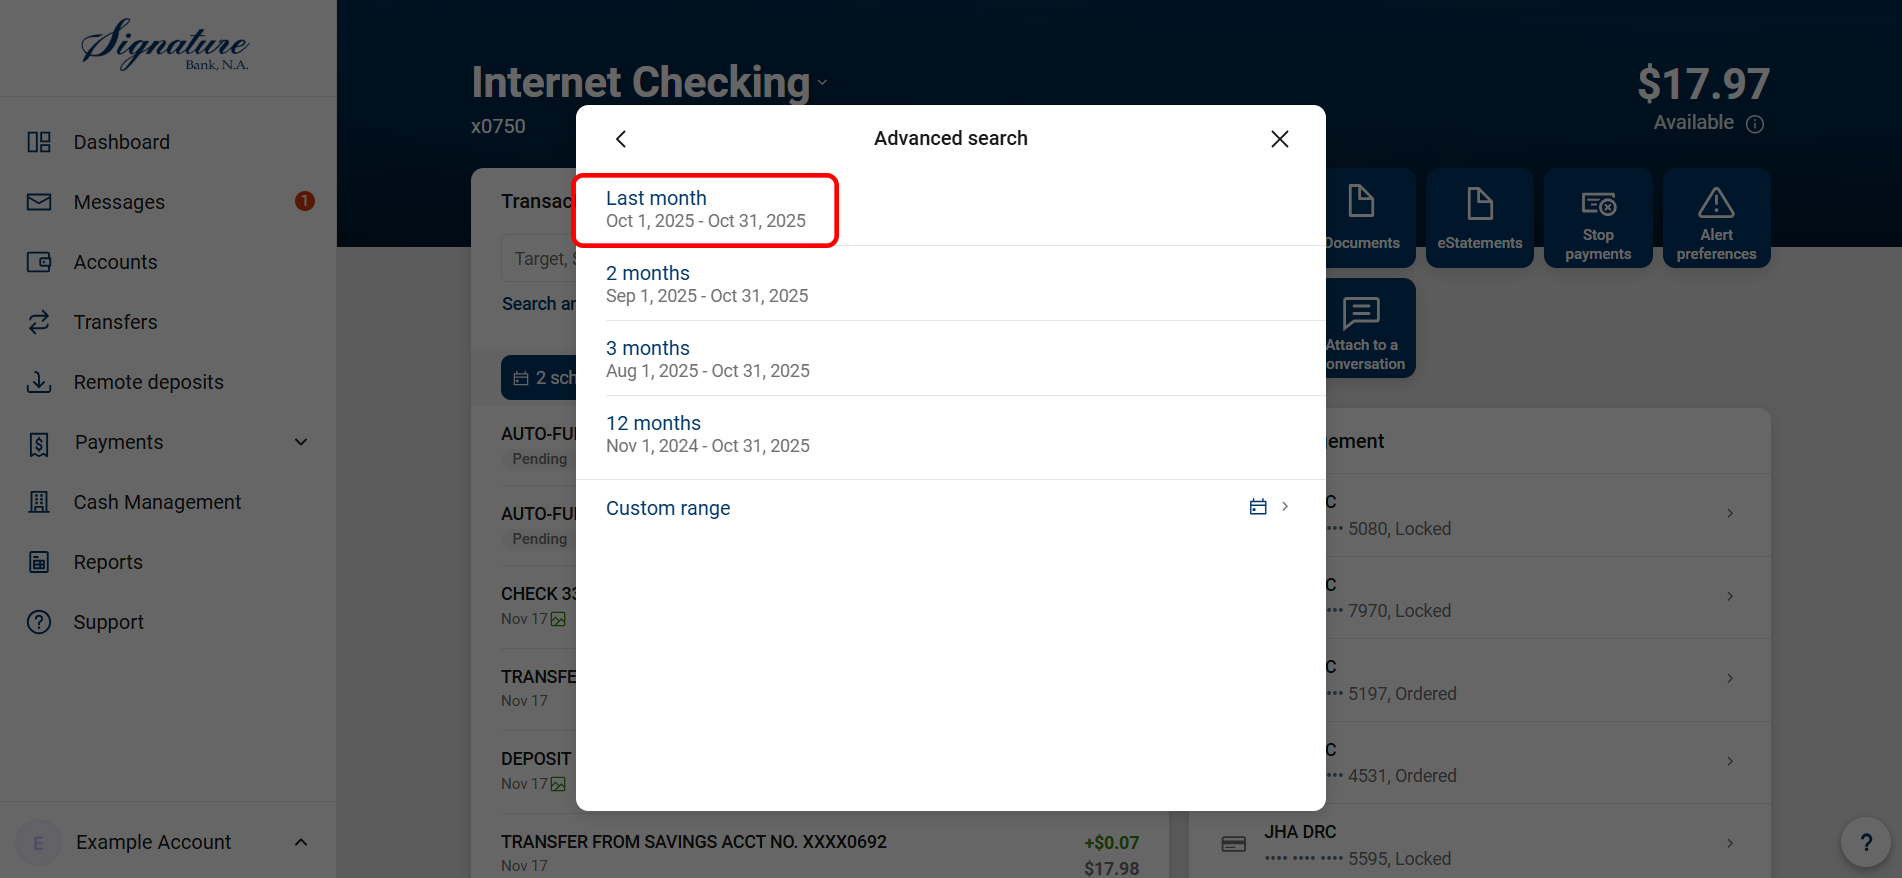
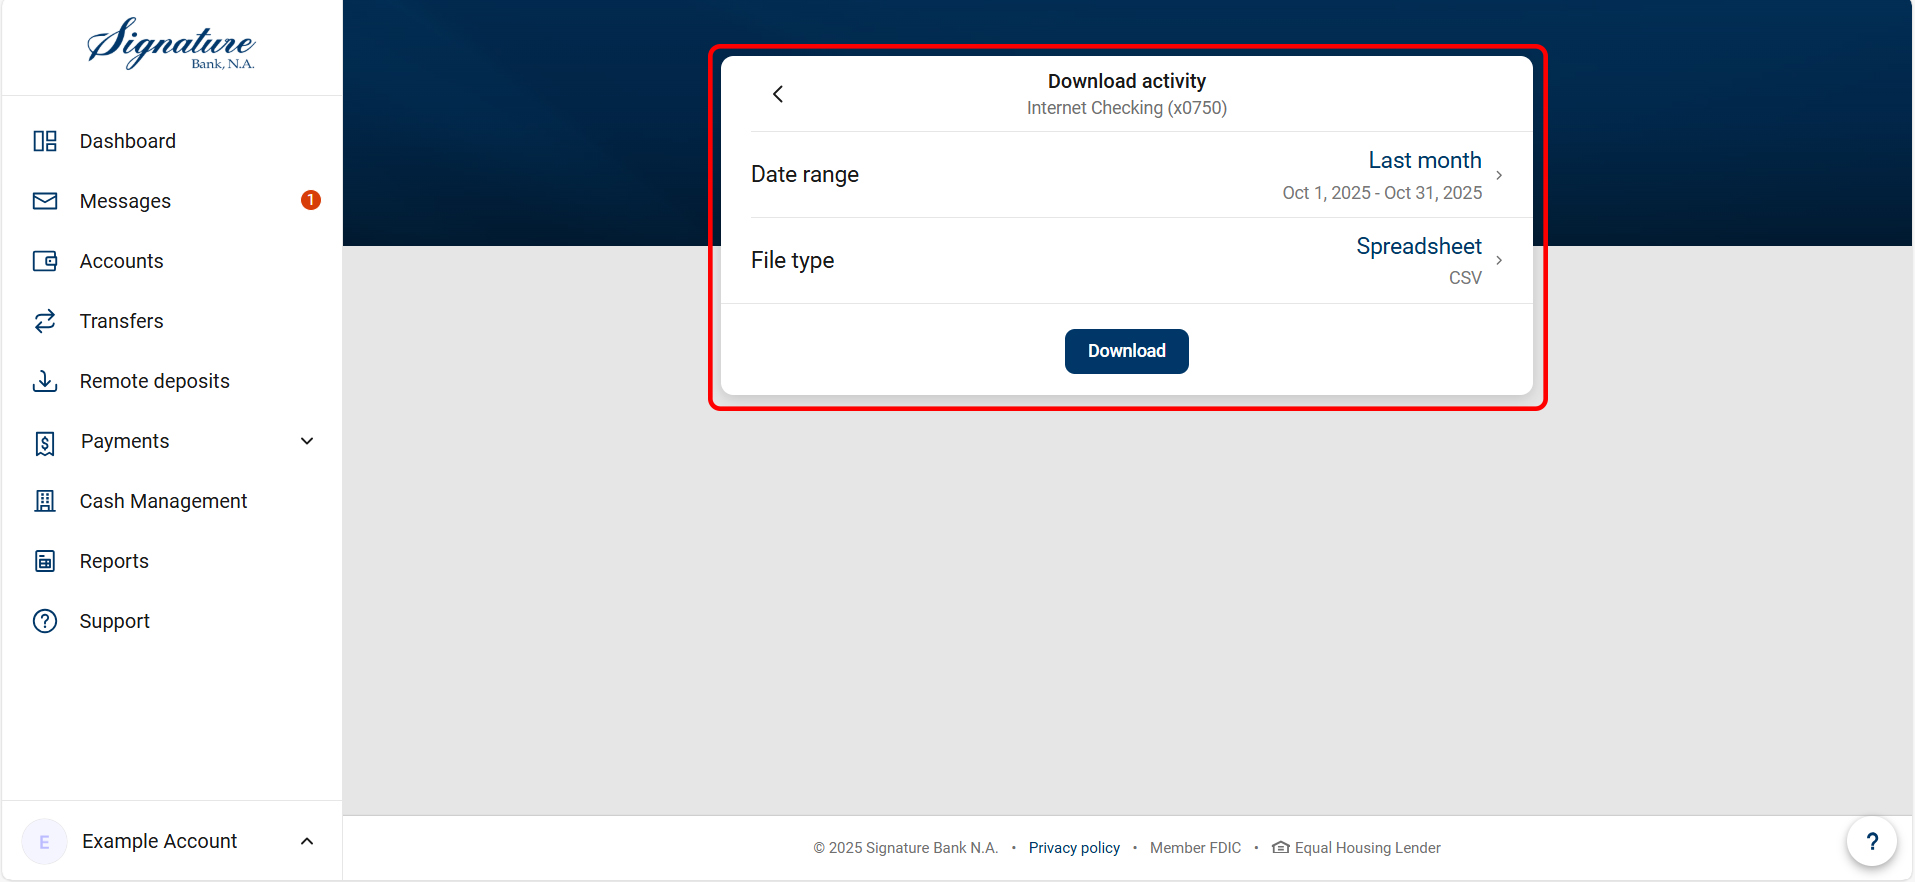
- For the Date Range, click on “Select”, then choose “Last Month” or any other selected range of dates based on your preference.
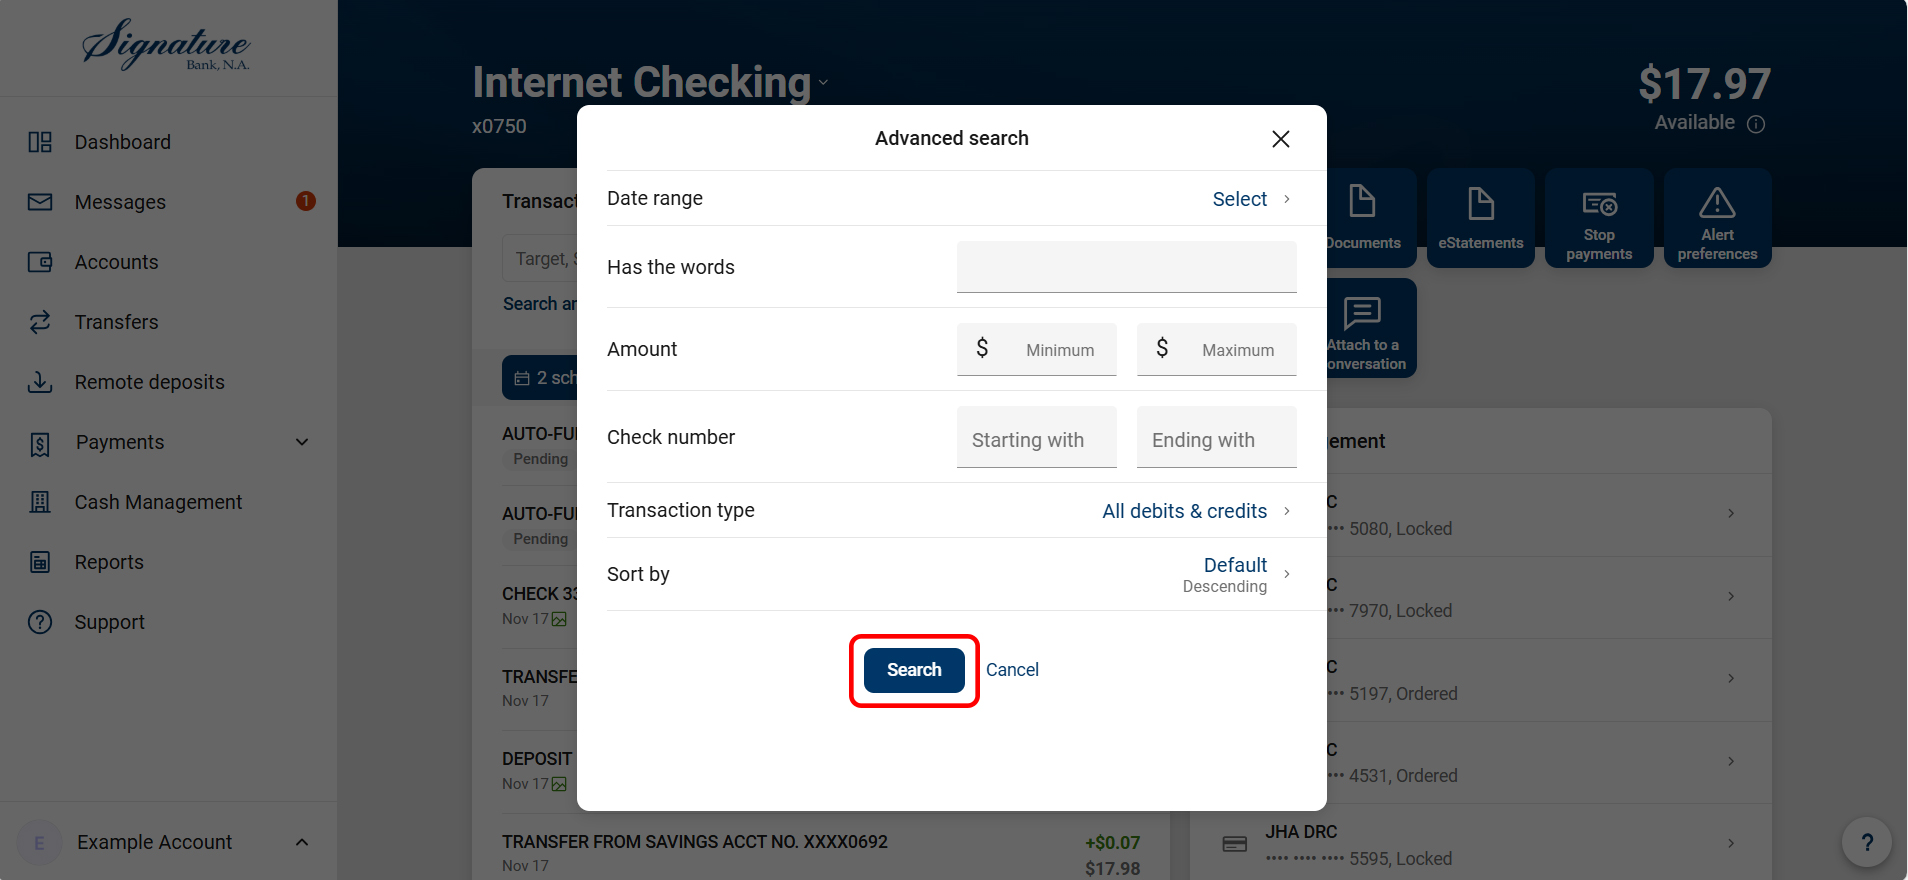
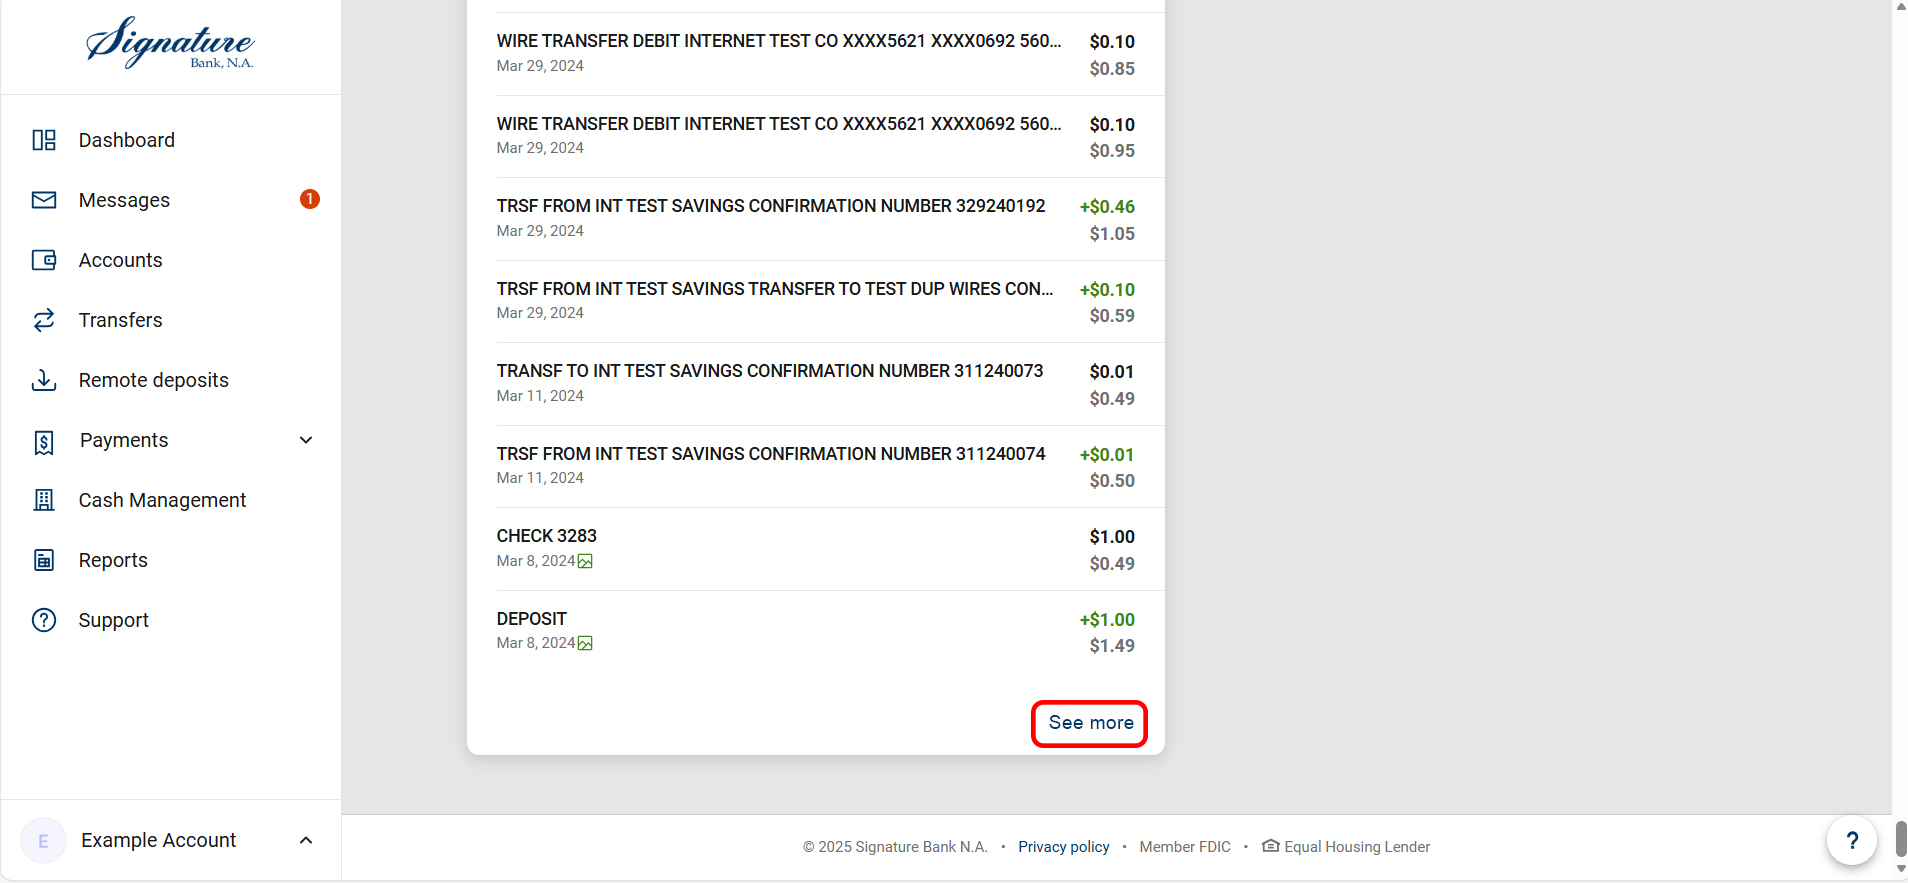
- Click Search, be sure to scroll to the bottom of the list and click "See more" to ensure all transactions are visible in your list.
- Click the Printer icon to print the transaction history data.
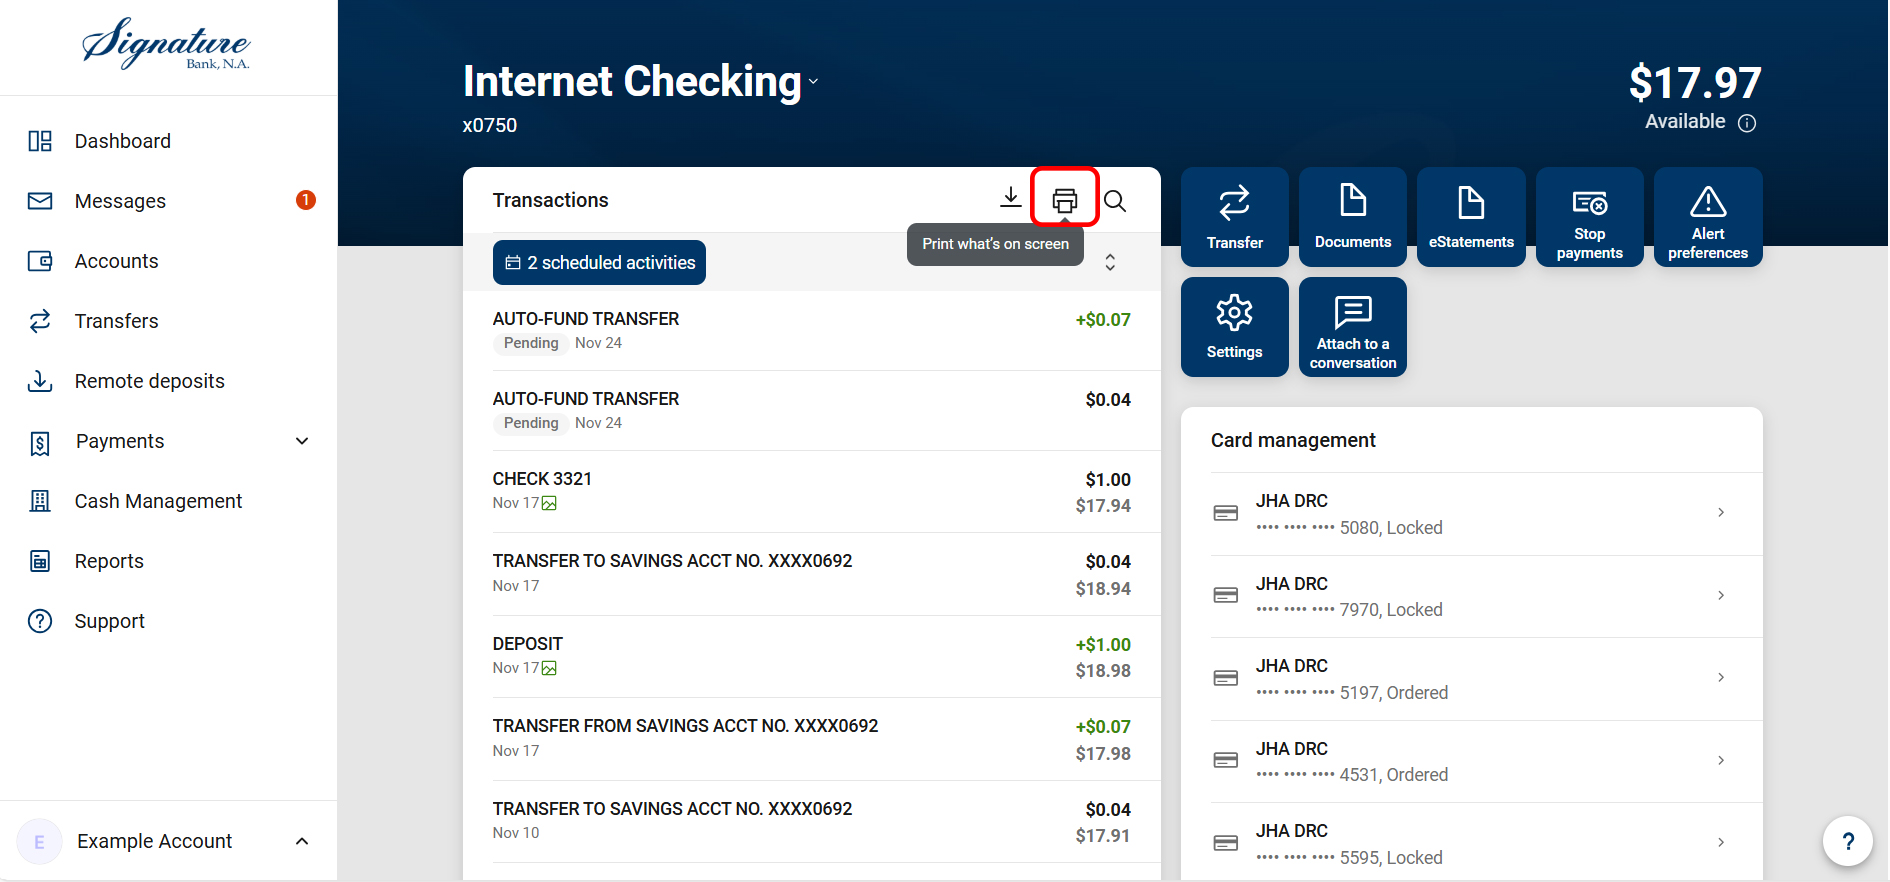
- If “print” is selected, this will open a tab that produces the statement activity/descriptive transactions and a running balance.

- Alternatively, select the Download icon to export transaction history to spreadsheet.

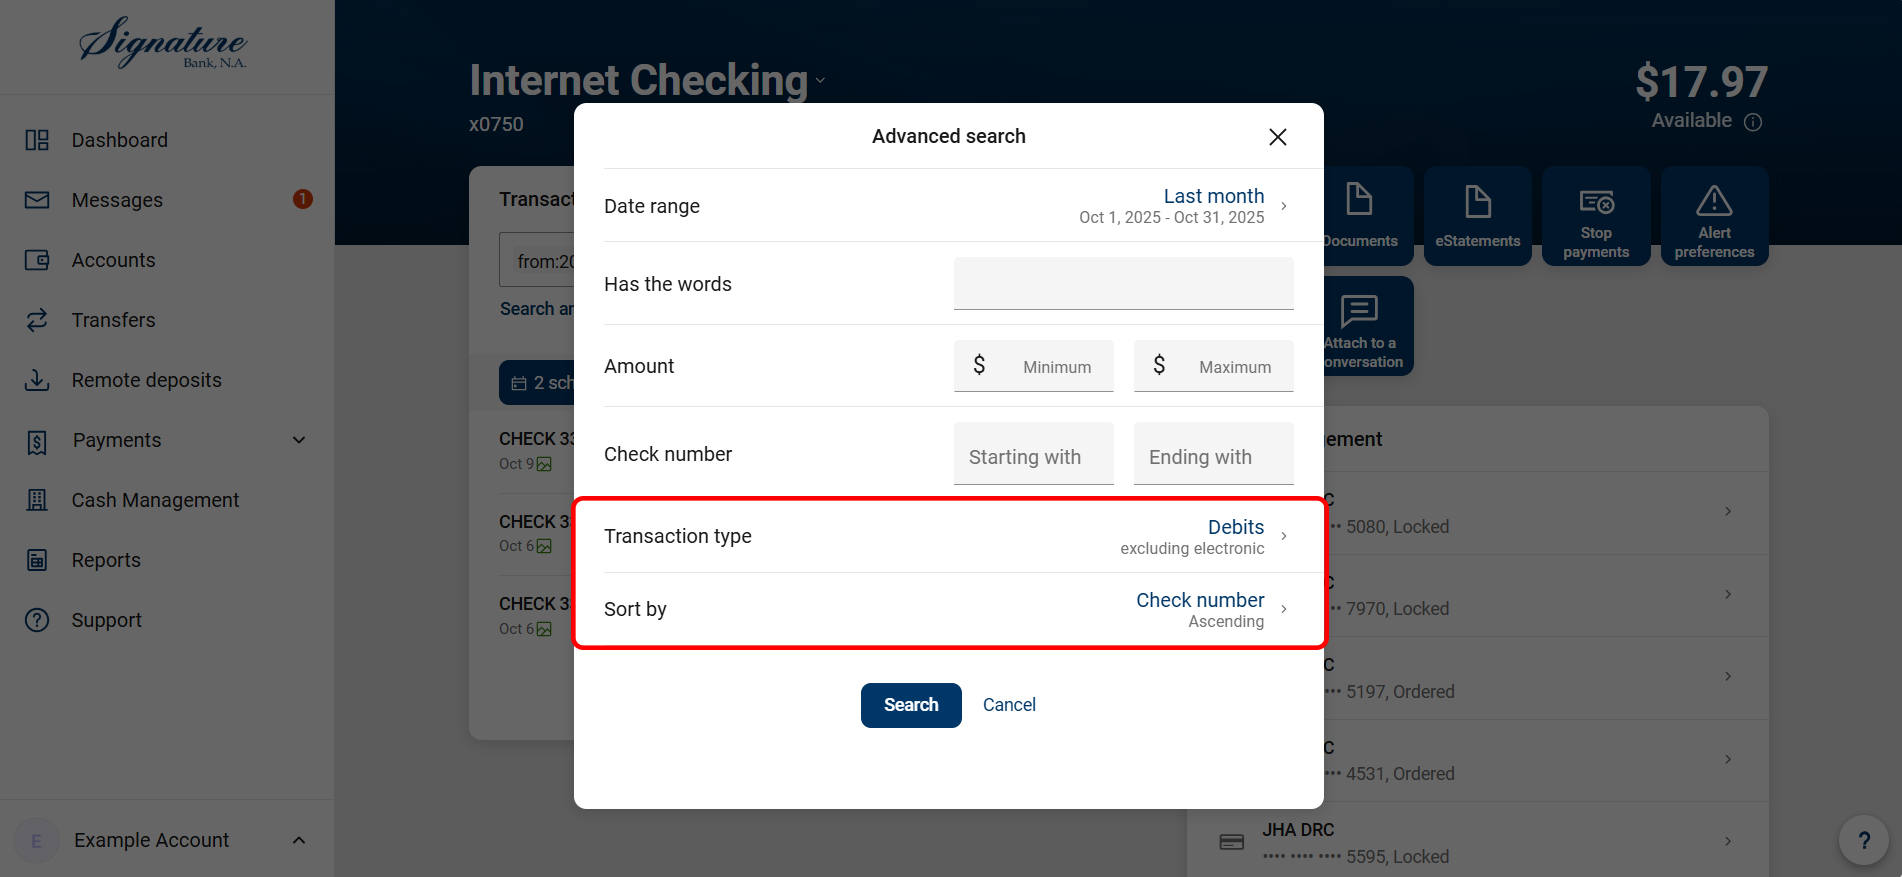
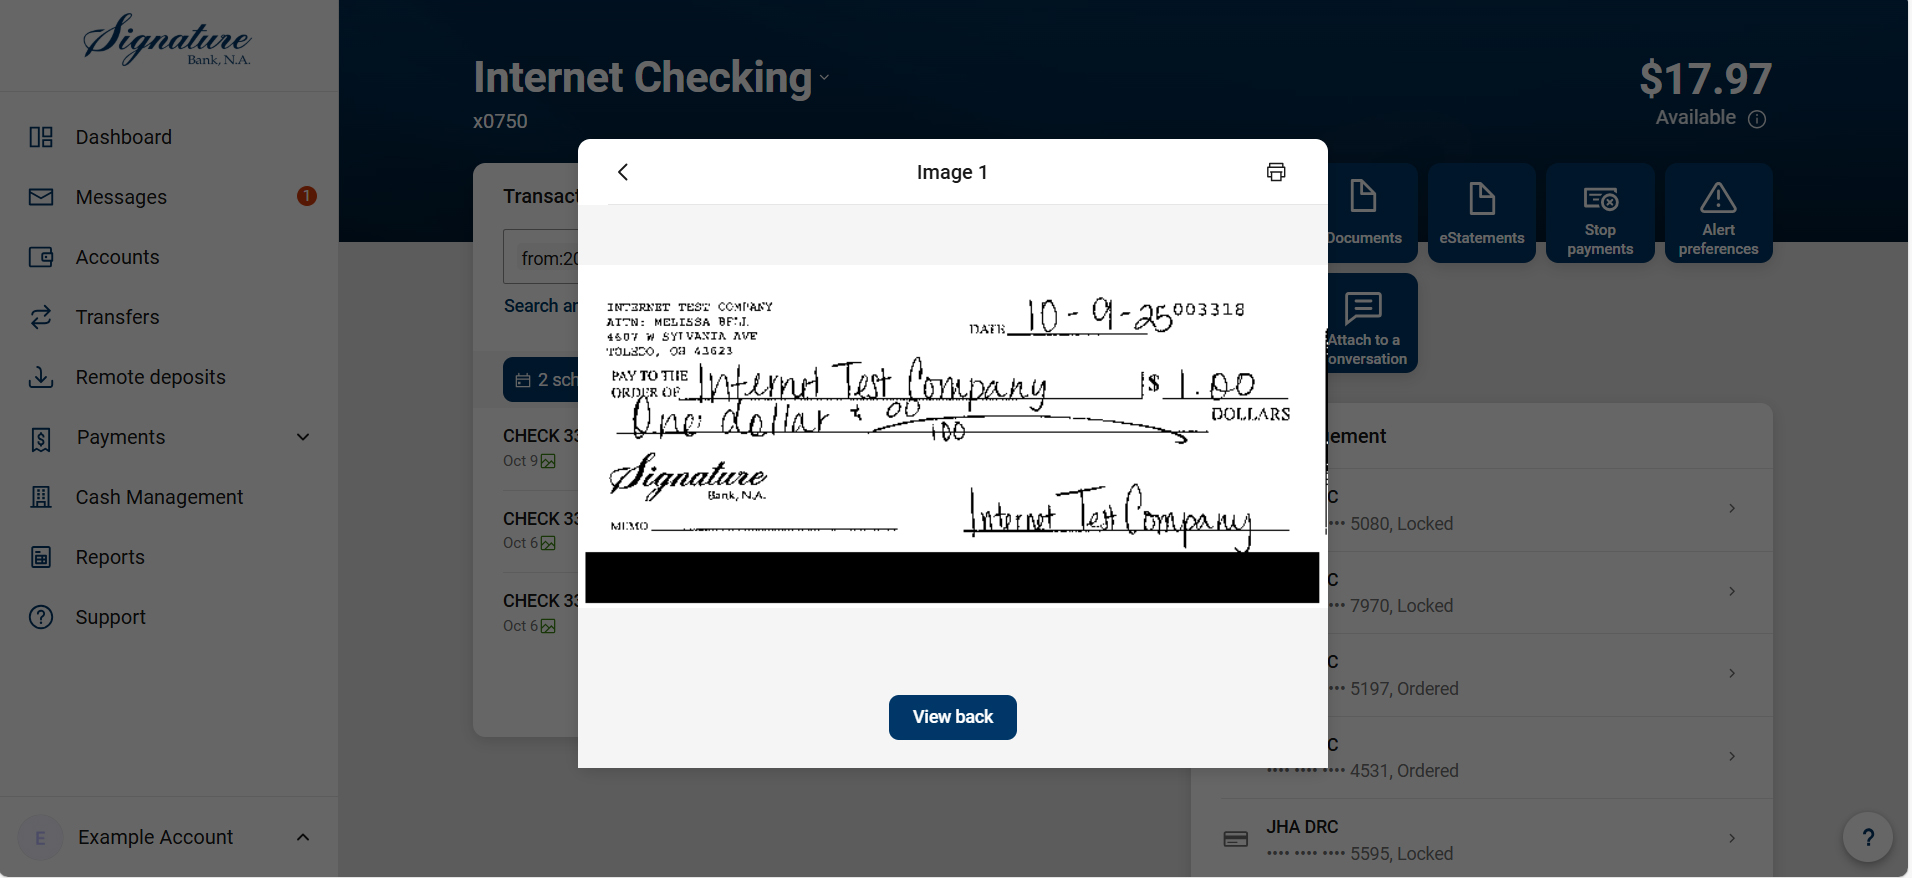
View Check Images
- Select “Accounts.”
- Select an account to view.
- For Checks only:
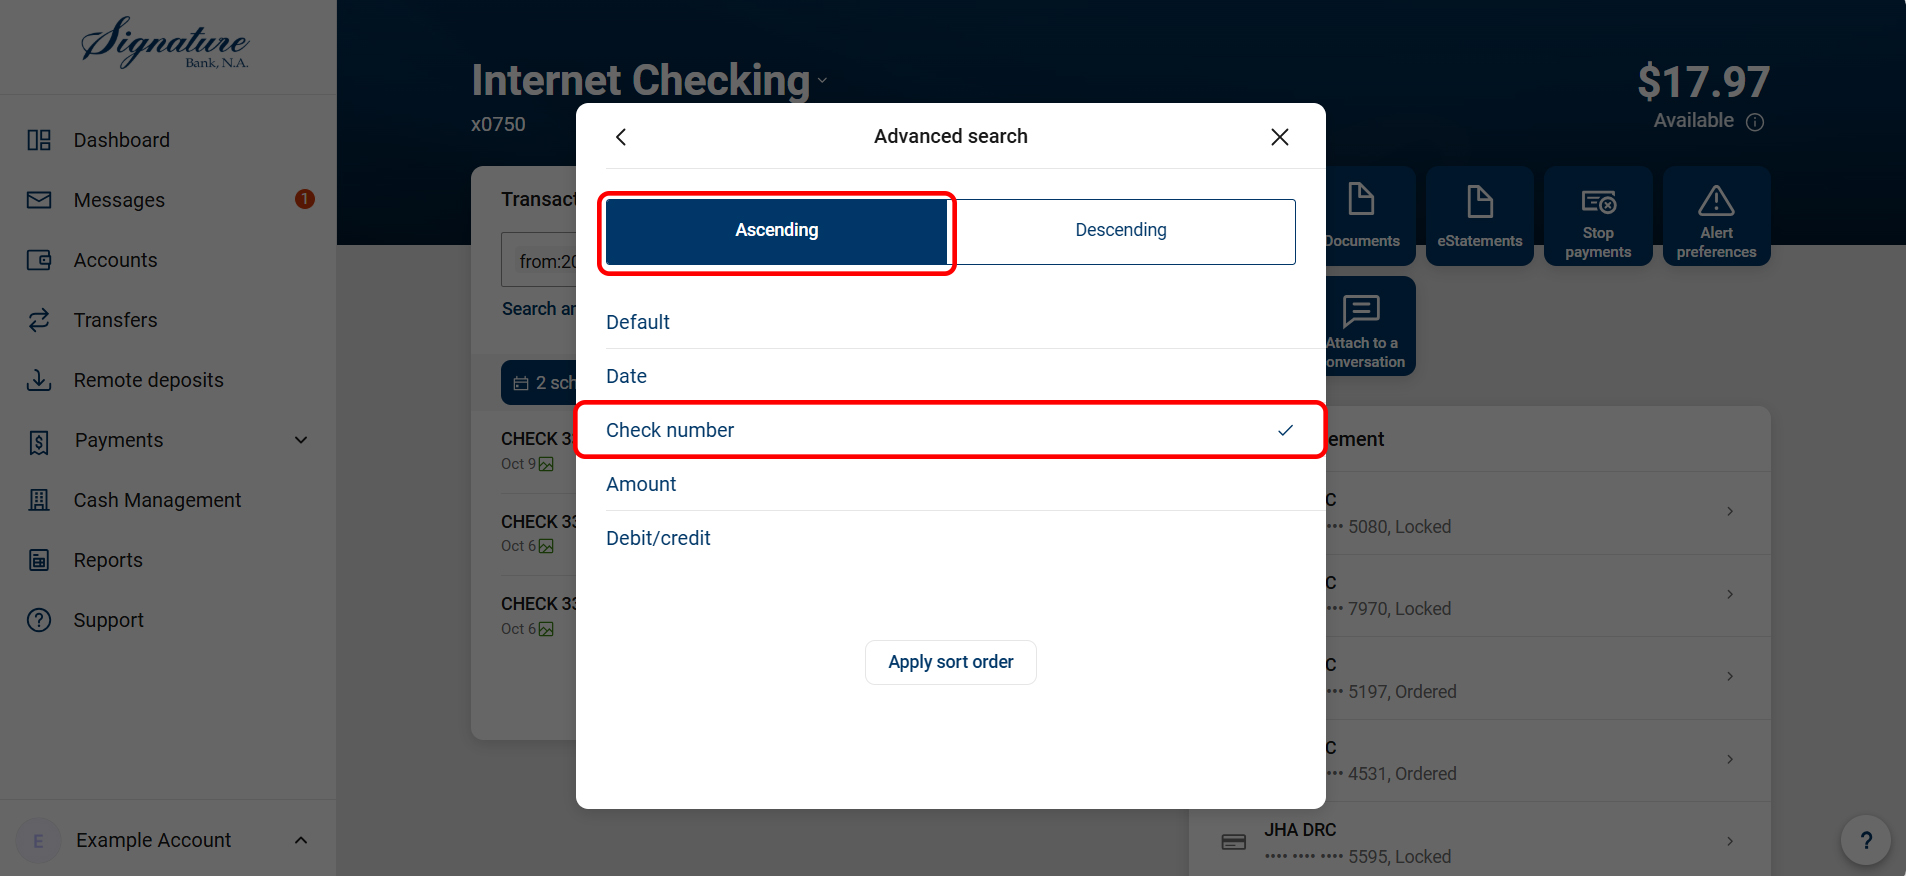
- Select "Search and sorting options."
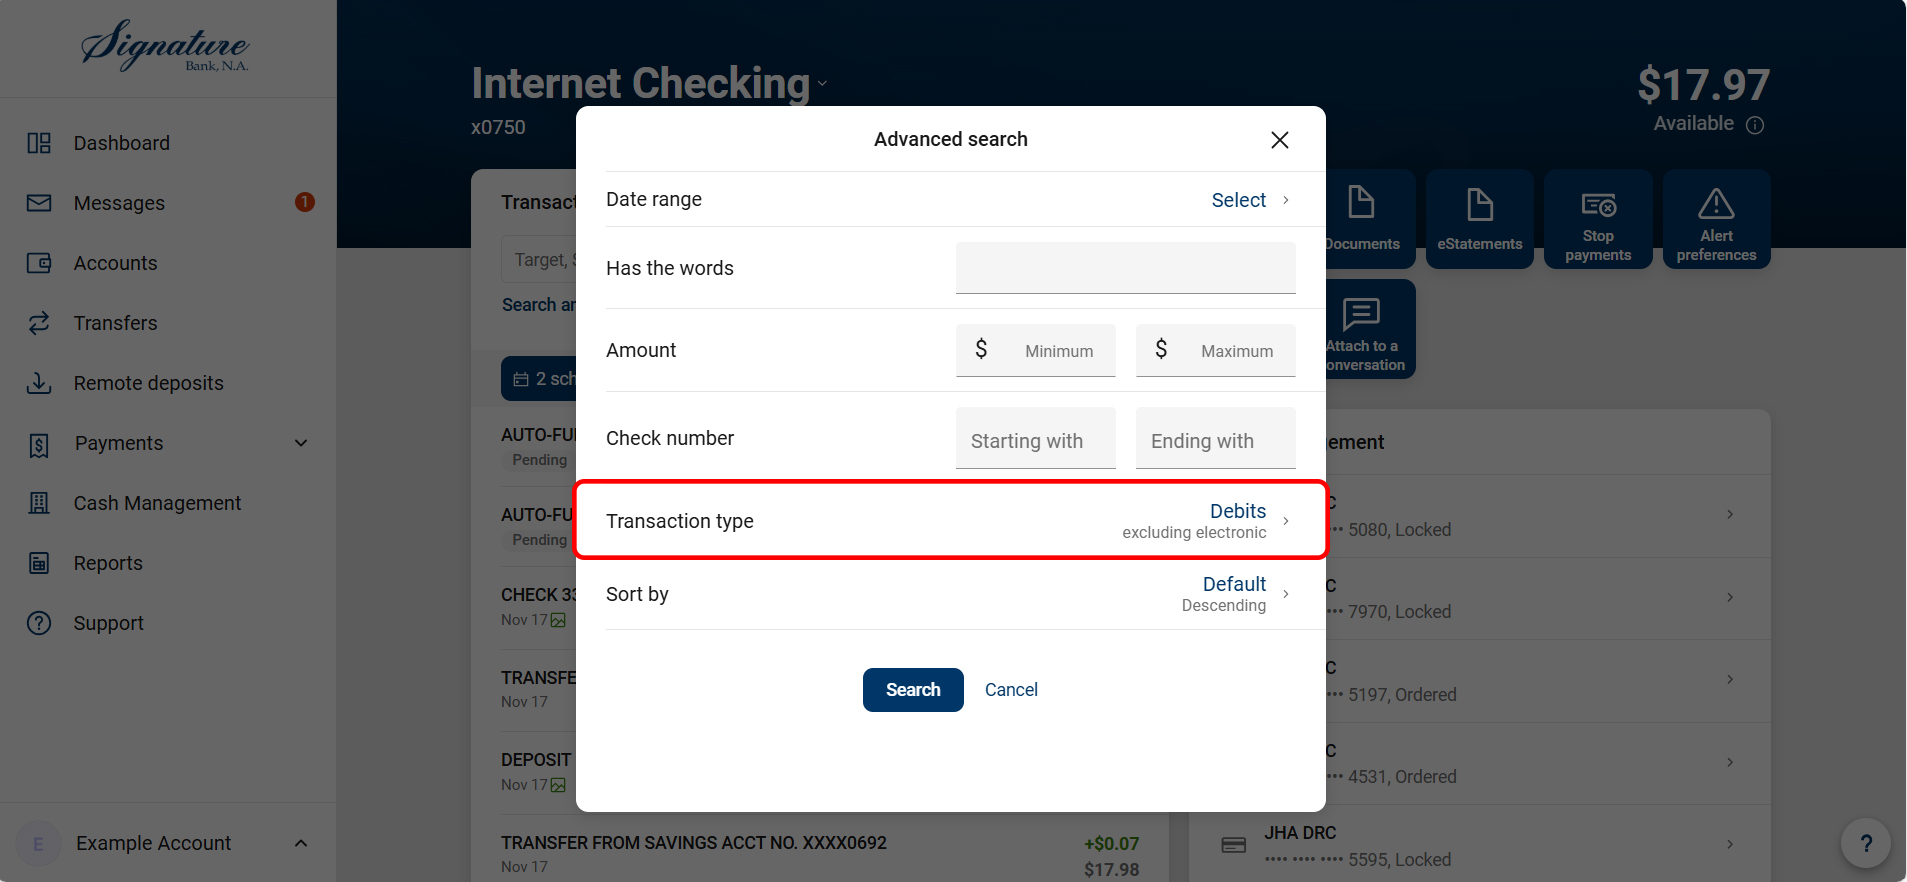
- Change “Transaction Type” to “Debits” and “Include Checks” – deselect other options.
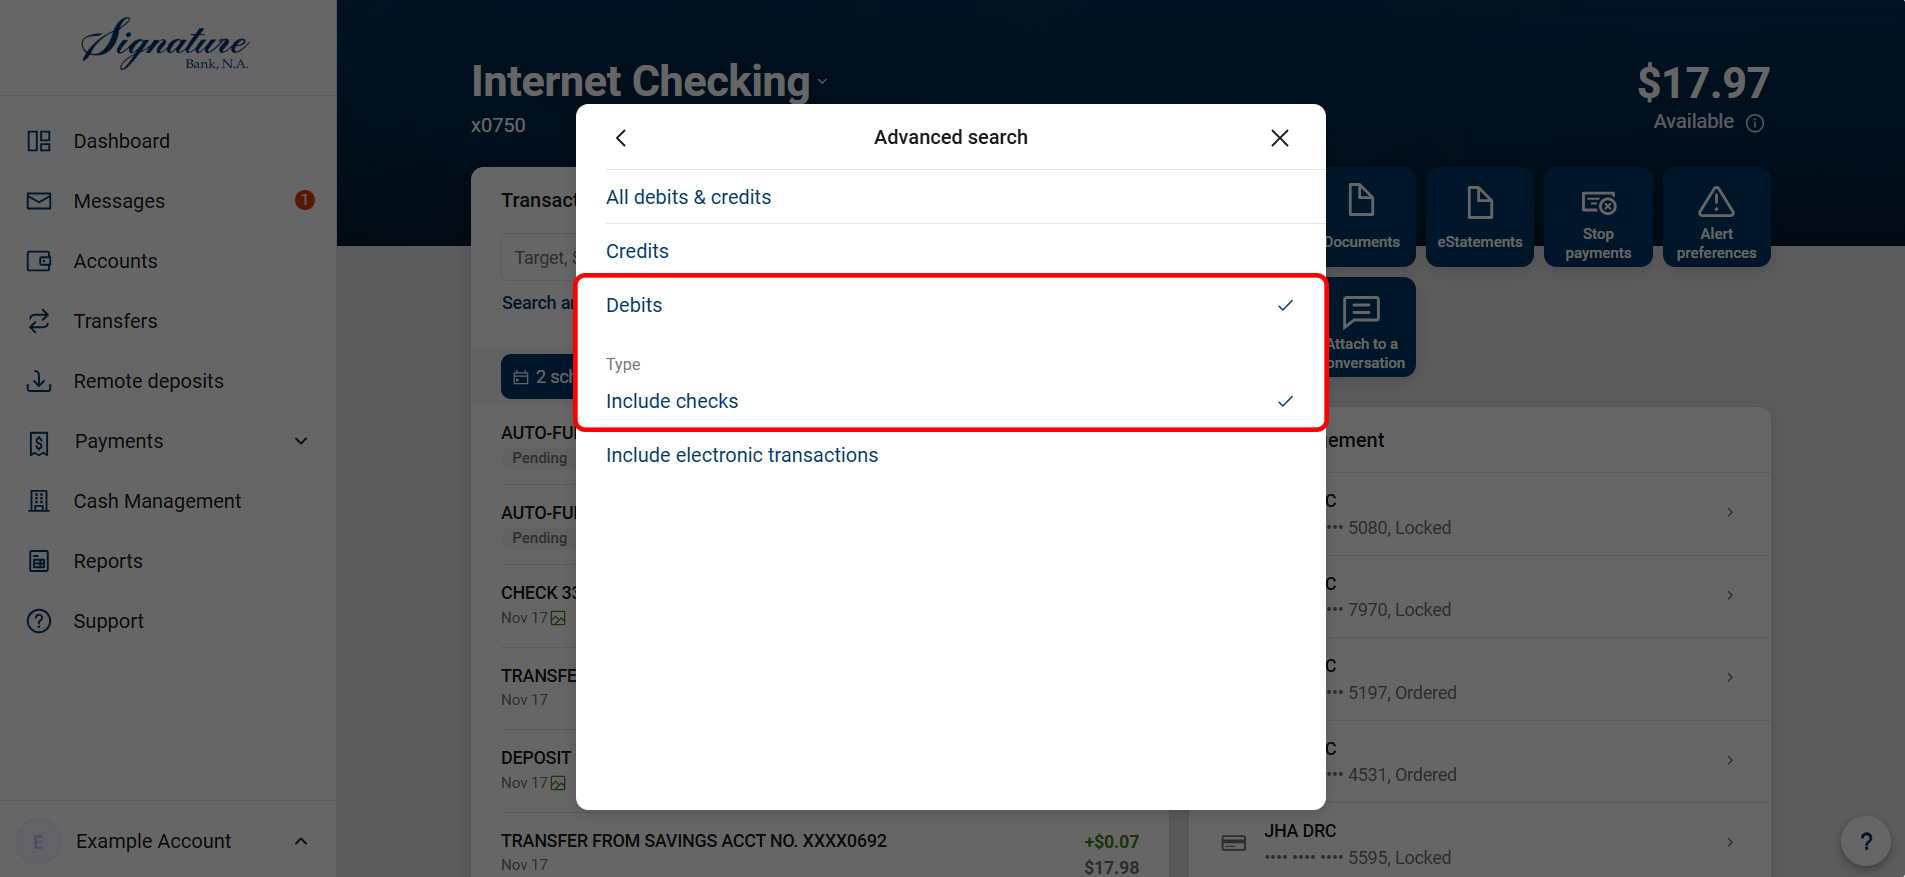
- Change “Sort” to Check Number Ascending.
- Select "Search and sorting options."
- Select a transaction to view details.
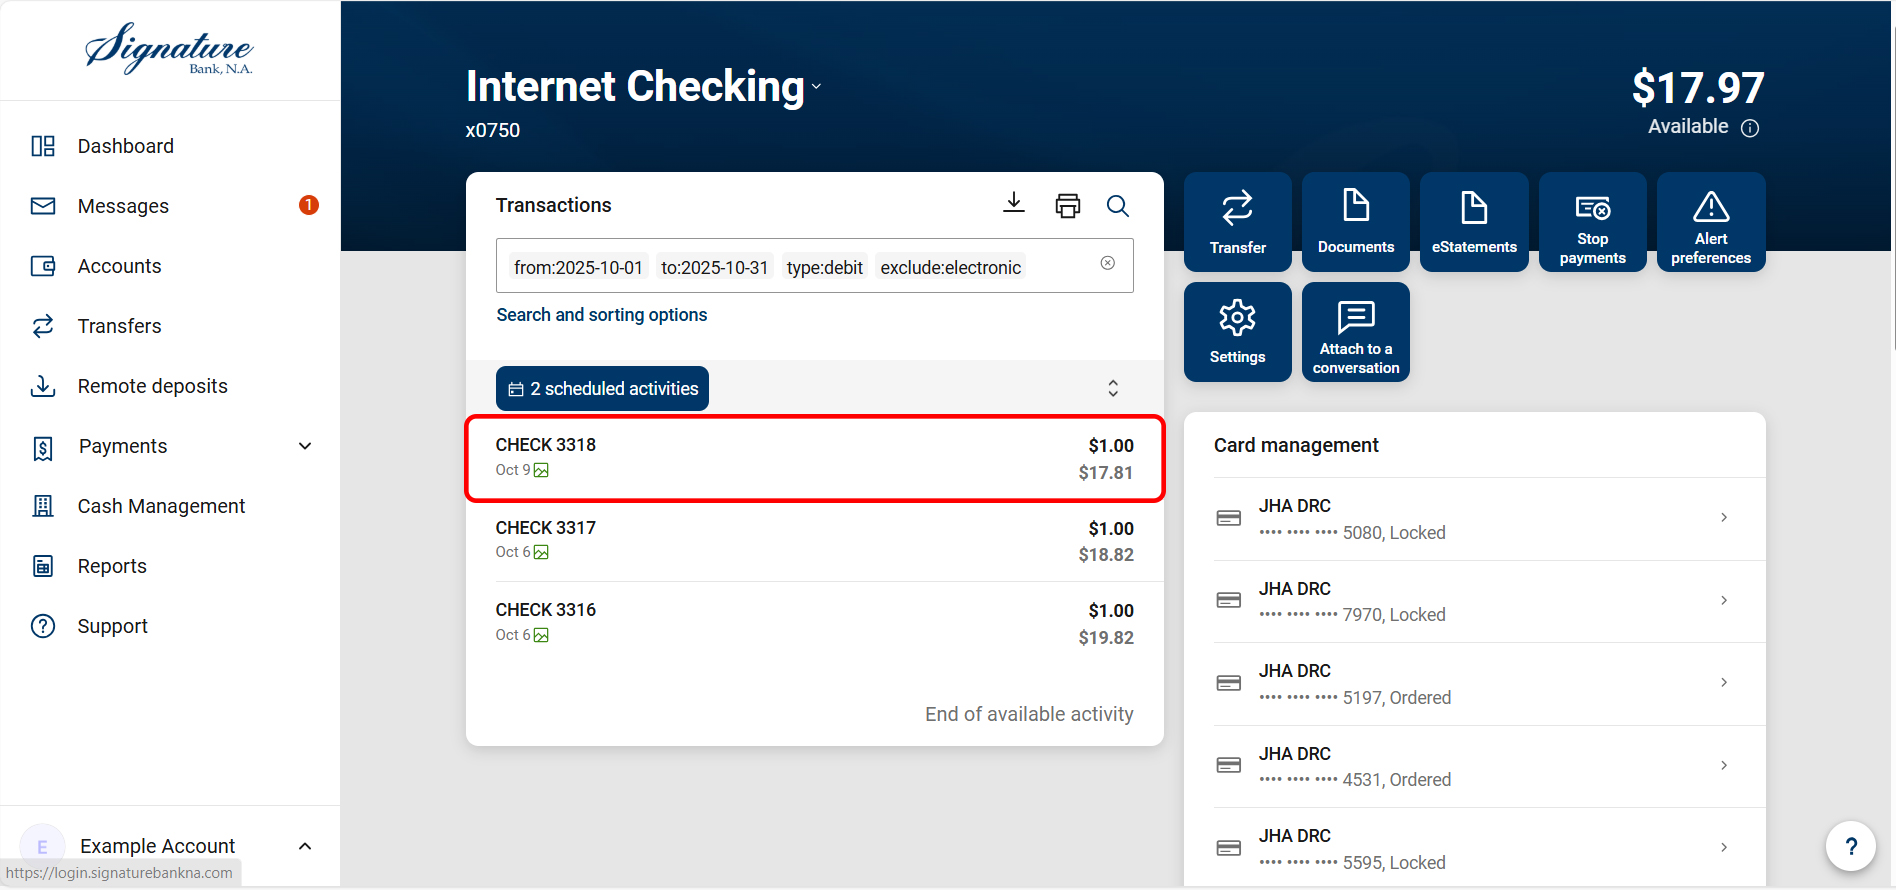
- Select the Check Image Icon on the transaction detail pane.

View and Download Check Information
How can I view and download transaction information before eStatements are available?
If you do not wish to enroll in eStatements, or want to begin reviewing your statement information before eStatements are released, another option to quickly print or download account history is available by performing the following steps:
- Select “Accounts.”
- Find the account you would like to see statement activity.
- Click on the magnifying glass.
- Select “Search and sorting options.”
- For the Date Range, click on “Select”, then choose “Last Month” or any other selected range of dates based on your preference.
- For Checks only:
- Change “Transaction Type” to “Debits” and “Include Checks” – deselect other options.
- Change “Sort” to Check Number Ascending.
- Change “Transaction Type” to “Debits” and “Include Checks” – deselect other options.
- Click Search, be sure to scroll to the bottom of the list and click "See more" to ensure all transactions are visible in your list.
- Click the Printer icon to print the transaction history data.
- If “print” is selected, this will open a tab that produces the statement activity/descriptive transactions and a running balance.
- Alternatively, select the Download icon to export transaction history to spreadsheet.
Coming Soon!
Create On Demand Activity Reports in Modern Platform
(Business Client Access Only)
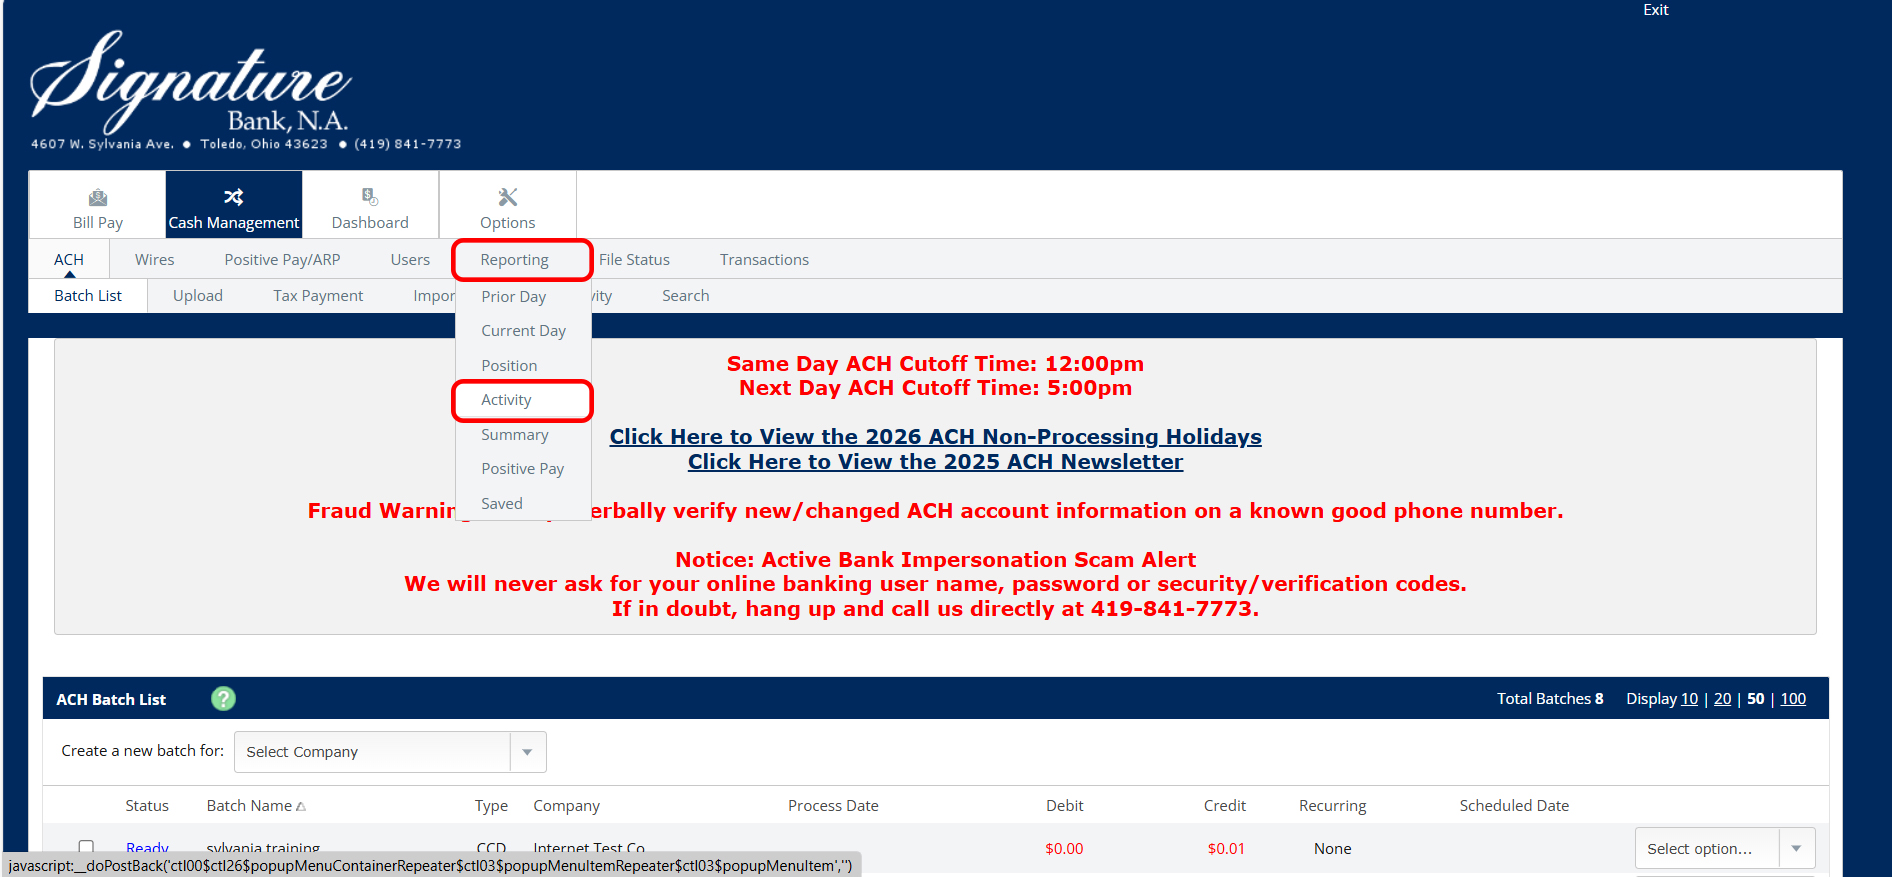
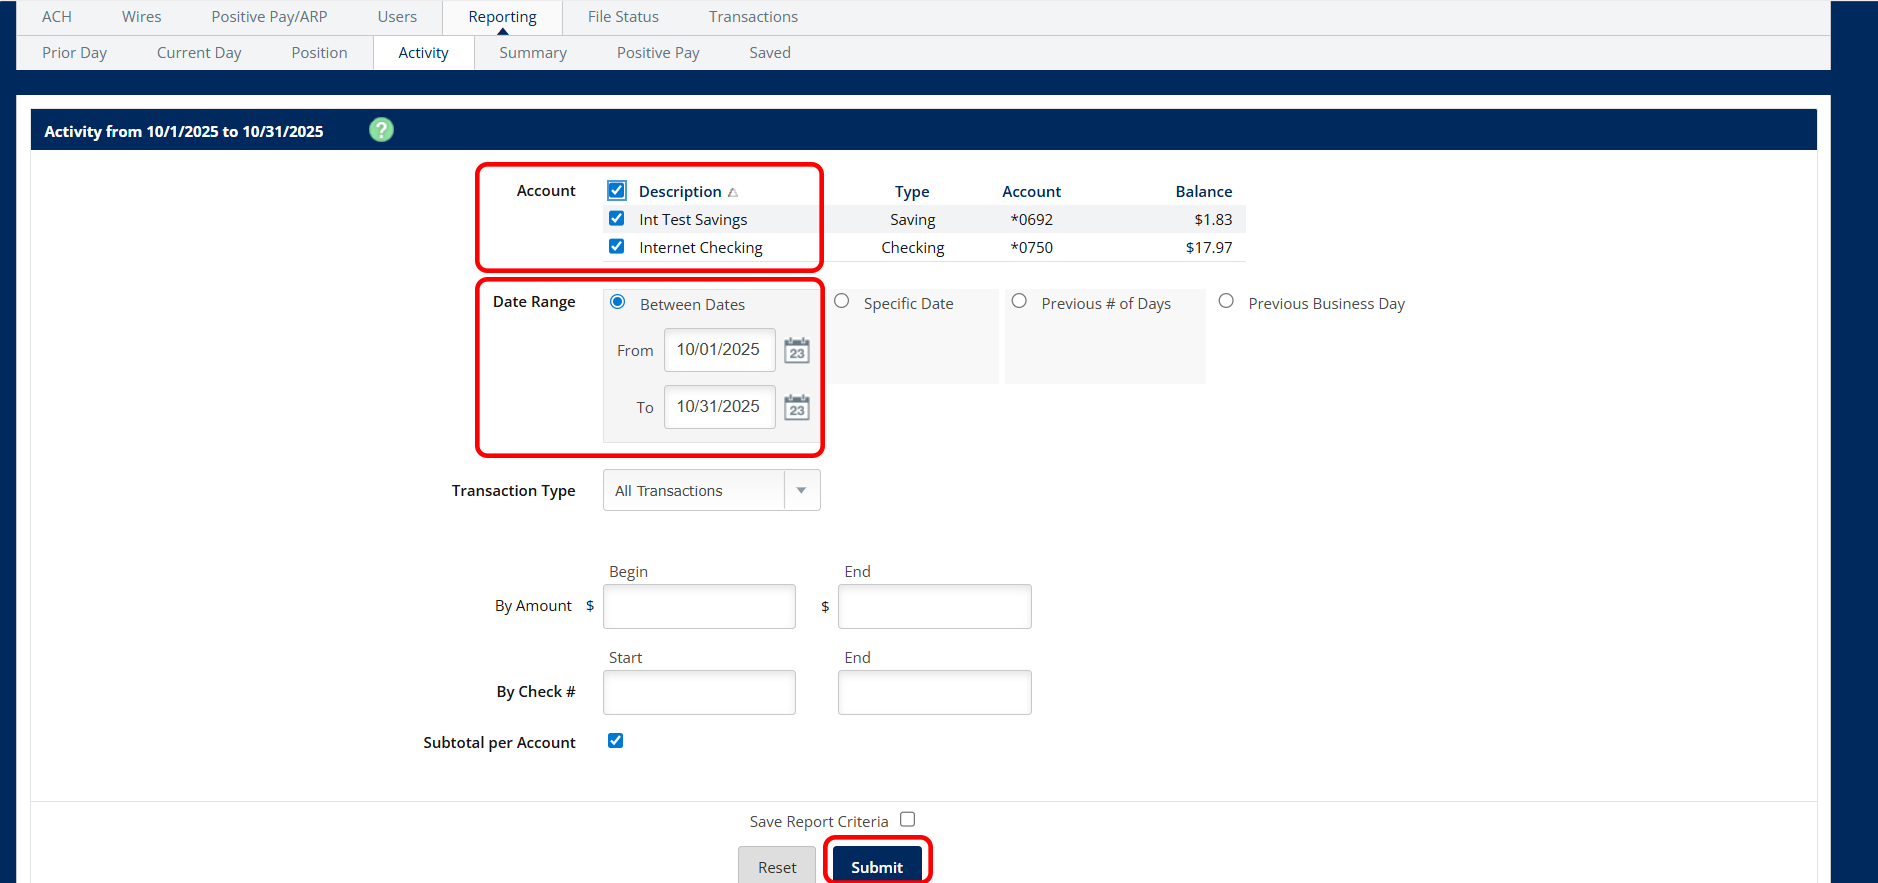
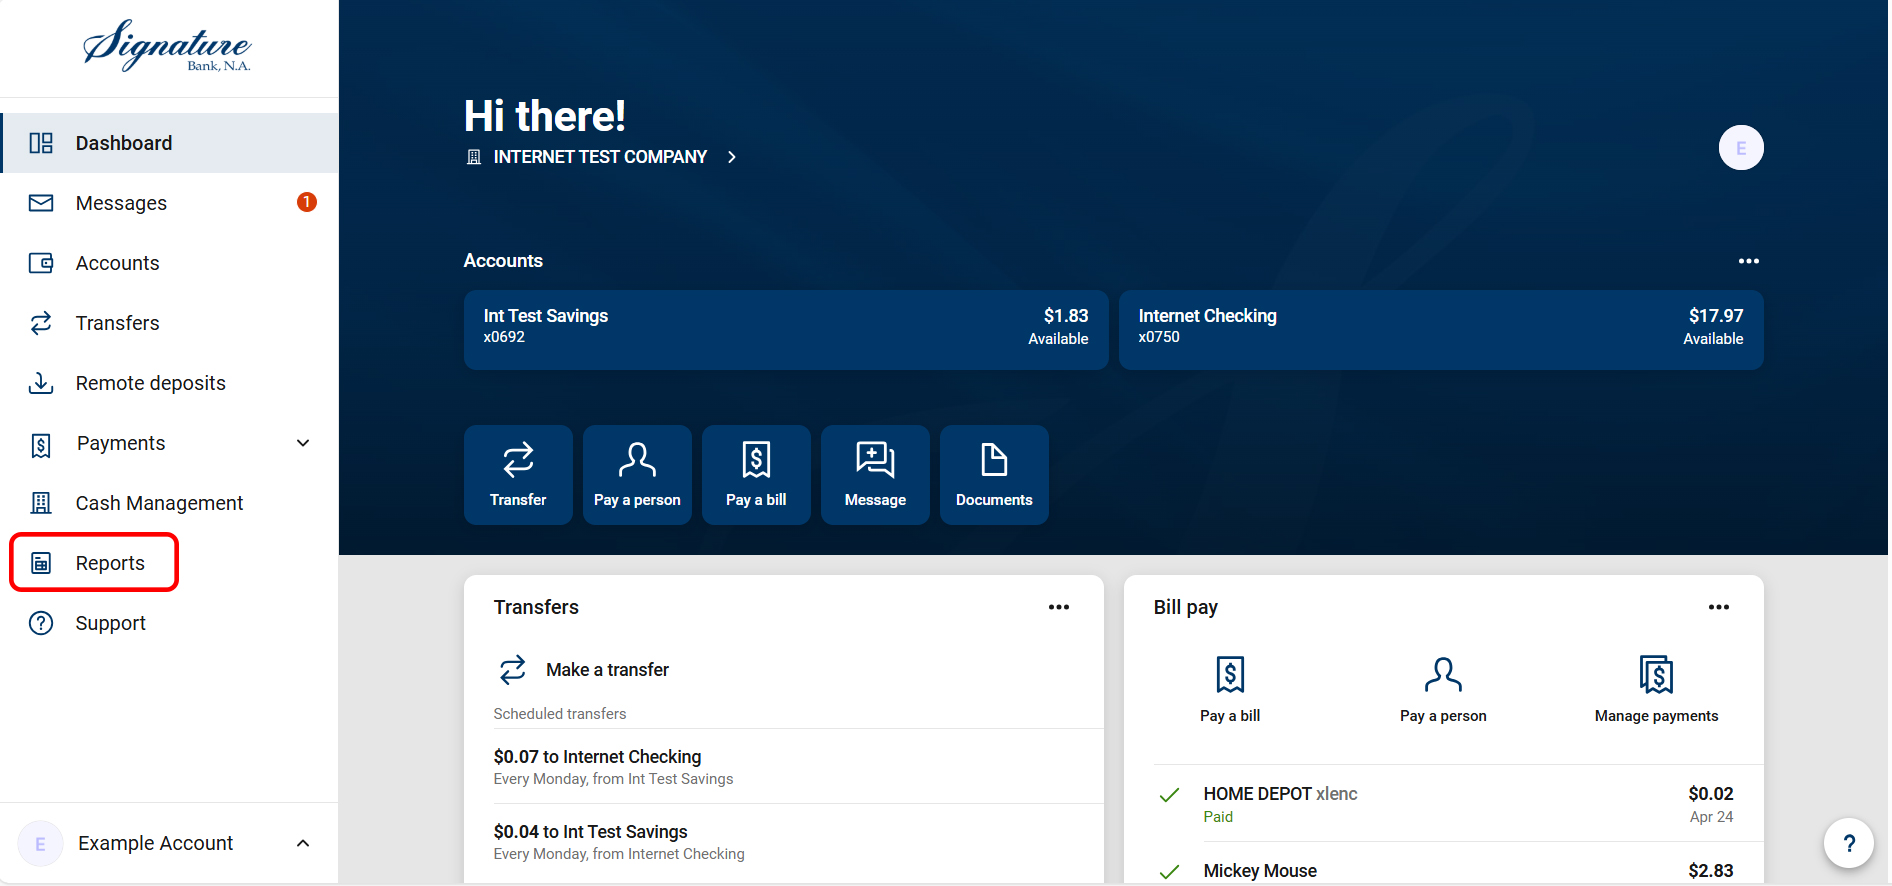
- Select "Reports."
- Select "Activity," choose the date range, and select "Update."
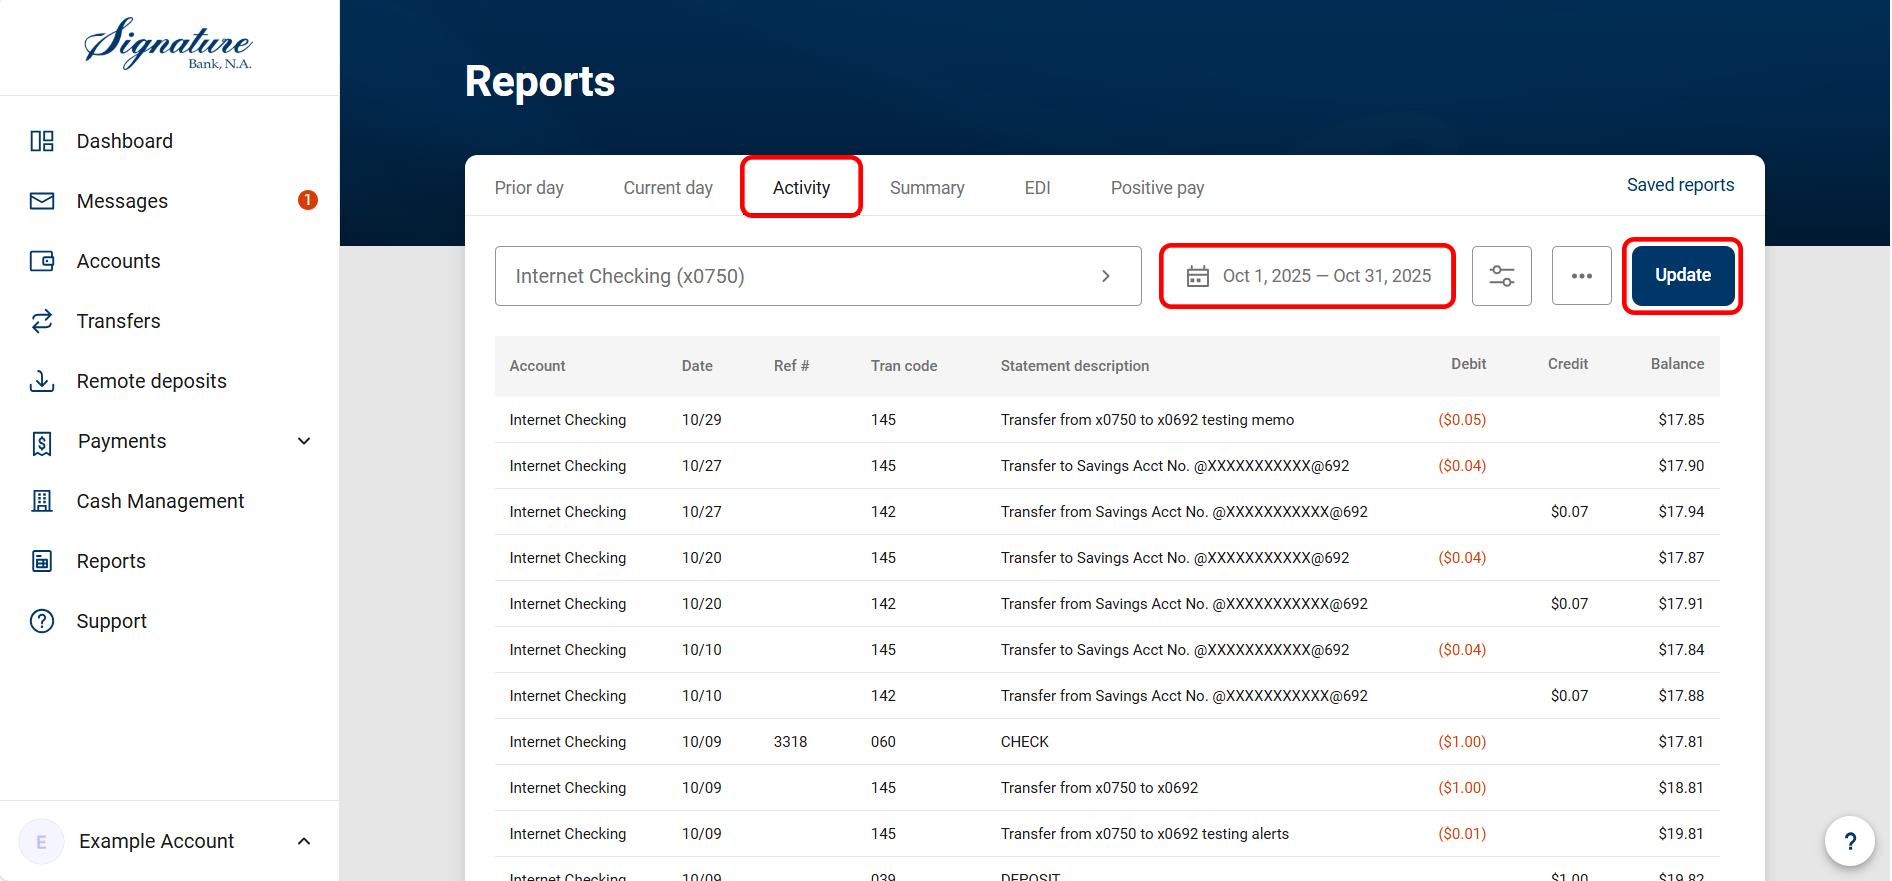
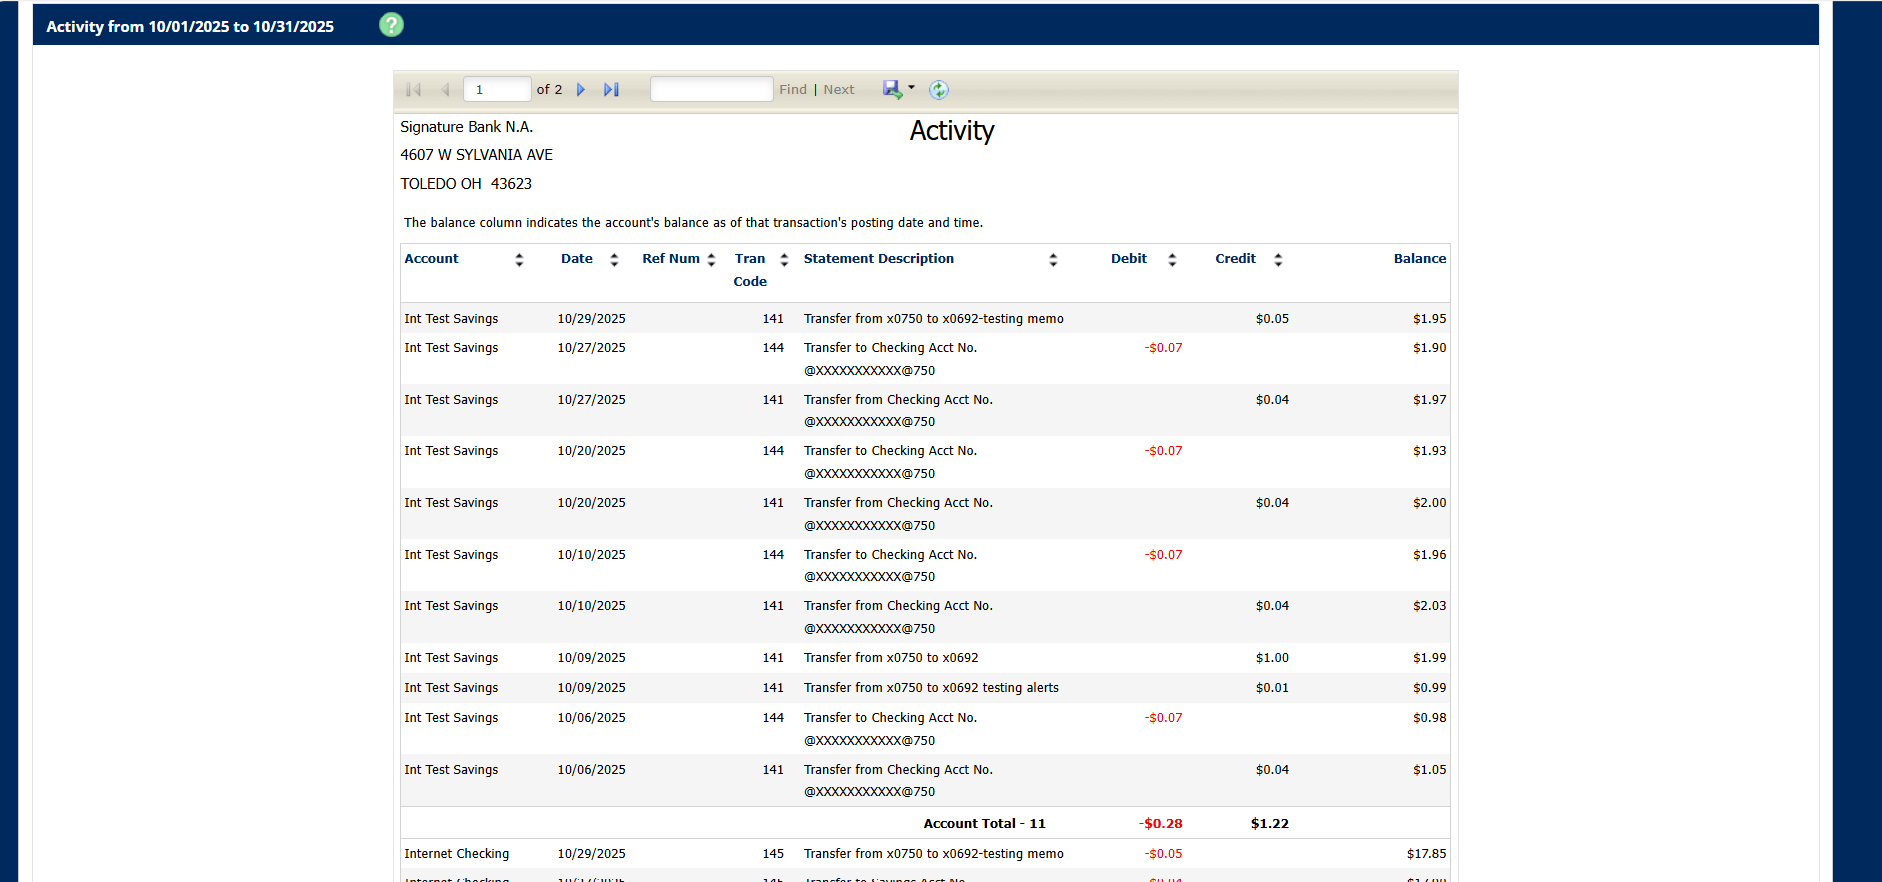
- Select Ellipses icon to:
- Download and save to file.

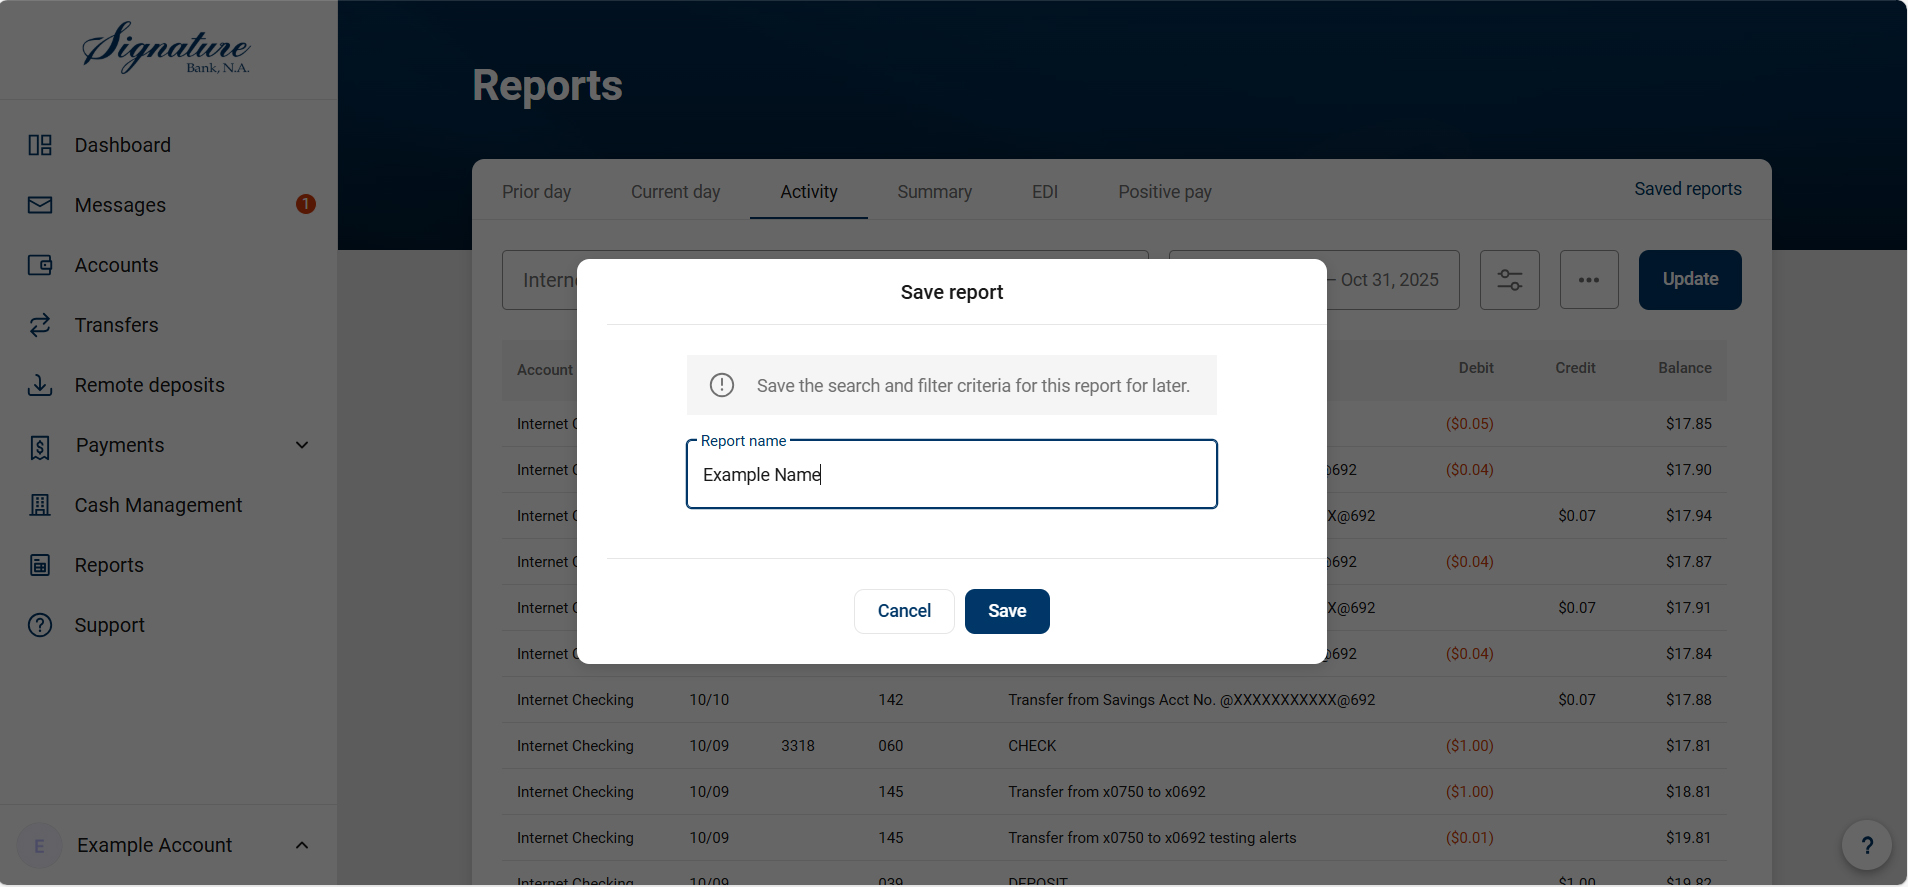
- Select "Save report" to store your current report settings for future use.
- Saved reports are viewed here.

- Download and save to file.